SwiftUI – HStack
In SwiftUI, the HStack is a layout container that arranges its child views horizontally in a line. It automatically adapts to the available space, making it a fundamental building block for creating user interfaces with horizontally aligned elements.
In this SwiftUI tutorial, we’ll cover the basic syntax of HStack, its customisation options, and practical examples to help you build layouts effectively.
Basic Syntax for HStack
The basic syntax for creating an HStack is:
HStack(alignment: .center, spacing: 10) {
    // Add views here
}
Here:
alignment: Aligns the child views along the vertical axis (.top,.center, or.bottom). The default is.center.spacing: Specifies the horizontal space between the child views. The default is determined by the system.- The content block contains the views to be arranged horizontally.
Each view inside the HStack is placed in the order it’s defined.
Examples
Let’s explore different ways to use HStack with examples.
Example 1: Simple HStack
This example demonstrates a basic HStack with three text views:
Code Example:
import SwiftUI

struct ContentView: View {
    var body: some View {
        HStack {
            Text("Item 1")
            Text("Item 2")
            Text("Item 3")
        }
        .padding()
    }
}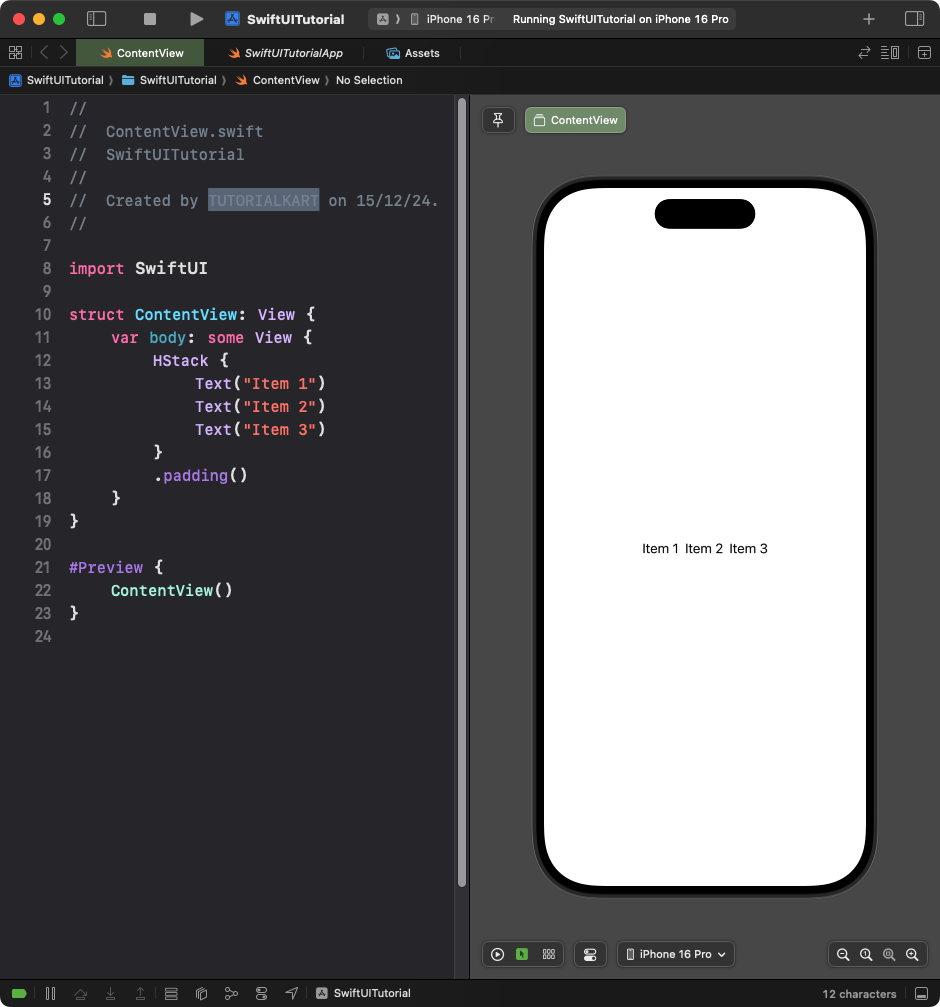
Explanation:
- The
HStackarranges the text views horizontally in the order they’re defined. - The
.padding()modifier adds space around the entire stack.
Result: Three text items are displayed in a horizontal row.
Example 2: Customising Spacing and Alignment
You can customize the alignment and spacing of the views in the HStack:
Code Example:
import SwiftUI

struct ContentView: View {
    var body: some View {
        HStack(alignment: .top, spacing: 20) {
            Text("Top Aligned")
                .font(.headline)
                .frame(width: 100, height: 50)
                .background(Color.blue.opacity(0.3))

            Text("Item 2")
                .frame(width: 100, height: 100)
                .background(Color.green.opacity(0.3))

            Text("Item 3")
                .frame(width: 100, height: 70)
                .background(Color.orange.opacity(0.3))
        }
        .padding()
    }
}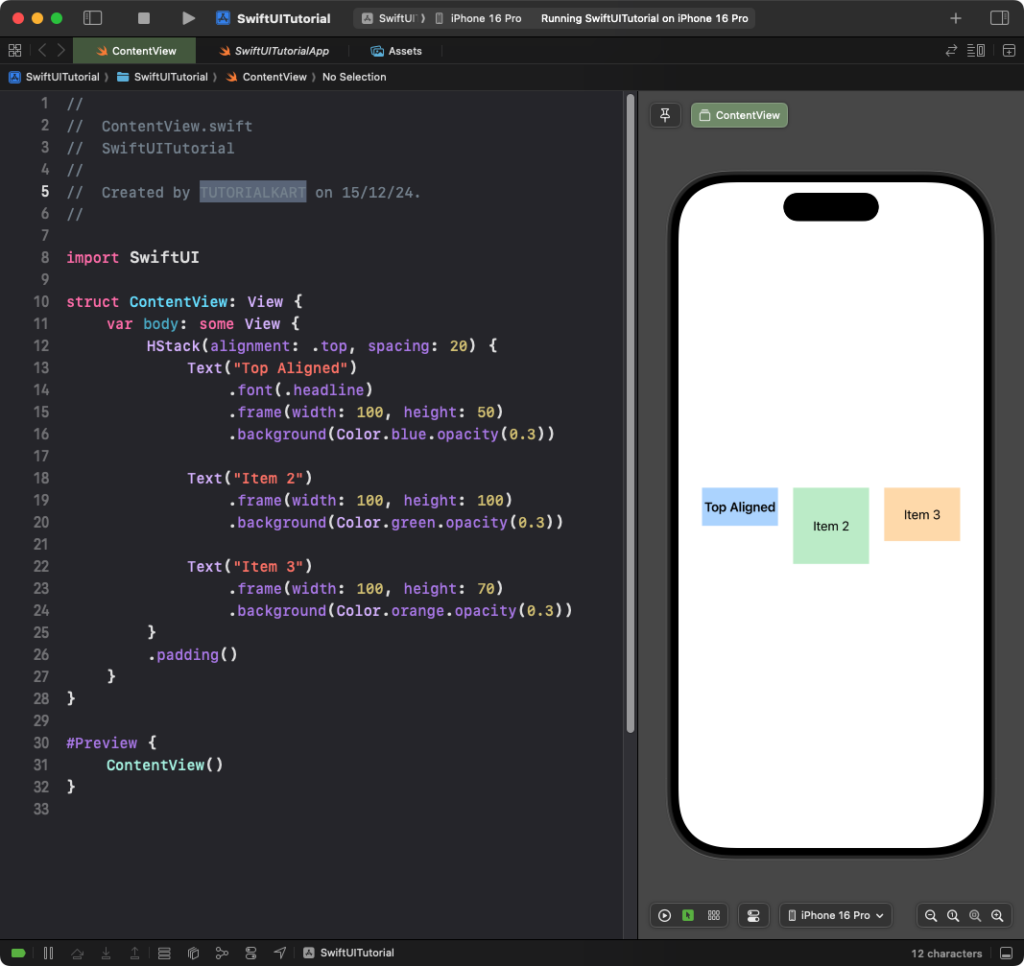
Explanation:
alignment: .top: Aligns the child views to the top.spacing: 20: Adds 20 points of space between each view.- Each view has a different size and a colored background for visual distinction.
Result: Three items are displayed horizontally, aligned at the top with spacing between them.
Example 3: Using Spacer in an HStack
Use Spacer to distribute content within the HStack:
Code Example:
import SwiftUI

struct ContentView: View {
    var body: some View {
        HStack {
            Text("Left")
            Spacer()
            Text("Right")
        }
        .padding()
    }
}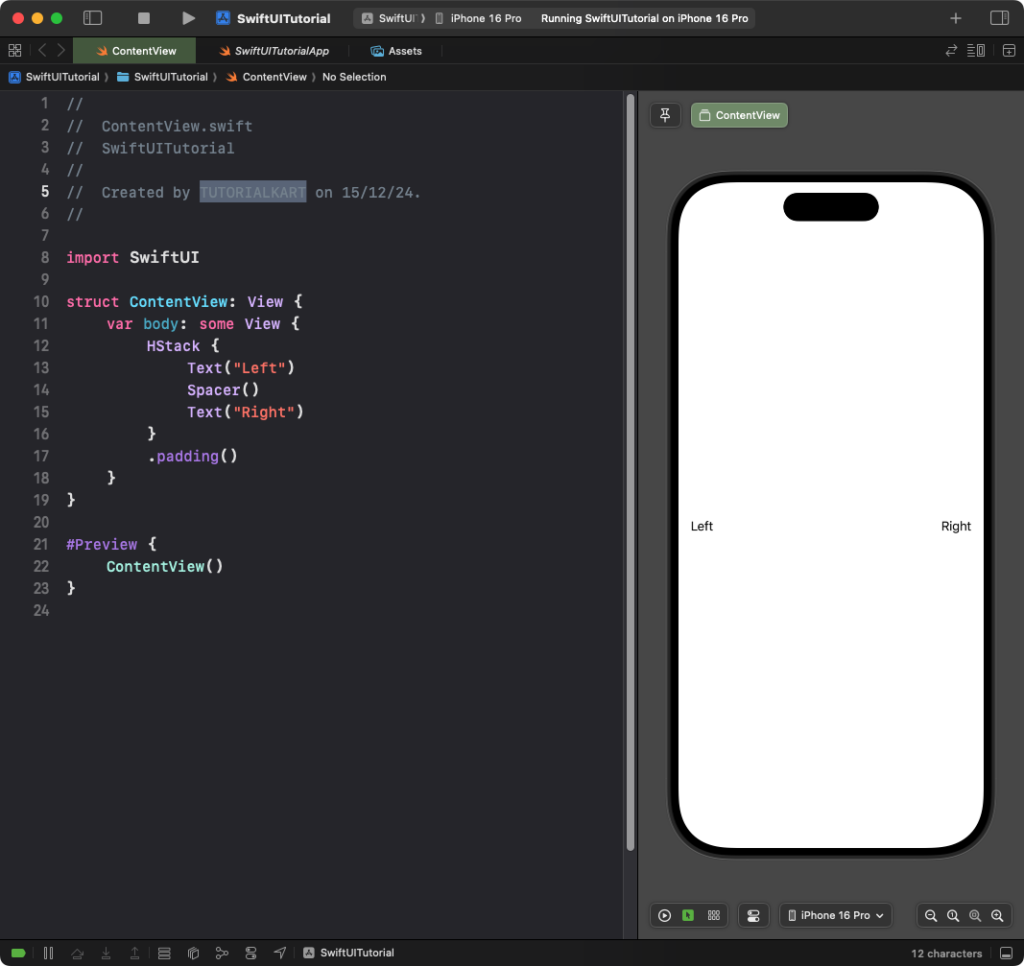
Explanation:
- The
Spacerpushes the “Left” text to the left and the “Right” text to the right. - The
.padding()modifier ensures the stack has space around it.
Result: The “Left” and “Right” text are displayed at opposite ends of the view.
Conclusion
The HStack is a core layout tool in SwiftUI for arranging views horizontally. By combining it with alignment, spacing, and other layout modifiers like Spacer, you can create dynamic and visually appealing horizontal layouts for your app.