SwiftUI – TextField for Numbers Only
In SwiftUI, a TextField is often used for text input, but there are situations where you want to restrict input to numbers only, such as for entering quantities, prices, or other numeric data. SwiftUI does not provide a built-in way to limit input to numbers, but you can achieve this functionality using a combination of modifiers and logic.
This tutorial demonstrates how to create a TextField that accepts only numeric input in SwiftUI with practical examples.
Restricting TextField to Numbers
To restrict input to numbers only, you can:
- Validate the input using
onChangeto filter out non-numeric characters. - Use a numeric data binding, such as an
IntorDouble, with a formatter. - Provide a custom keyboard with the
.keyboardType(.numberPad)modifier.
Examples
Let’s explore how to create a TextField for numbers only with practical examples.
Example 1: Filtering Non-Numeric Input
This example uses the onChange modifier to validate the input and ensure only numeric characters are allowed:
Code Example:
import SwiftUI
struct ContentView: View {
@State private var input: String = ""
var body: some View {
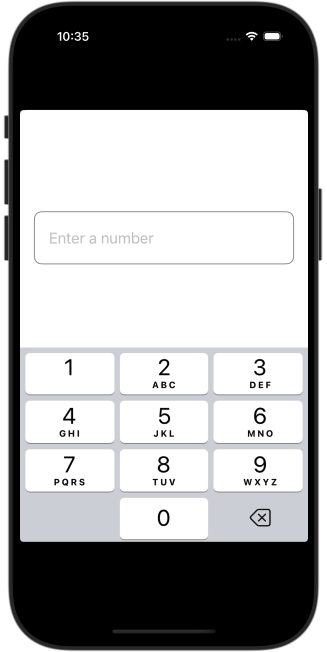
TextField("Enter numbers only", text: $input)
.keyboardType(.numberPad) // Shows numeric keyboard
.onChange(of: input) { newValue in
input = newValue.filter { $0.isNumber } // Filters non-numeric characters
}
.padding()
.overlay(
RoundedRectangle(cornerRadius: 8)
.stroke(Color.gray, lineWidth: 1)
)
.padding()
}
}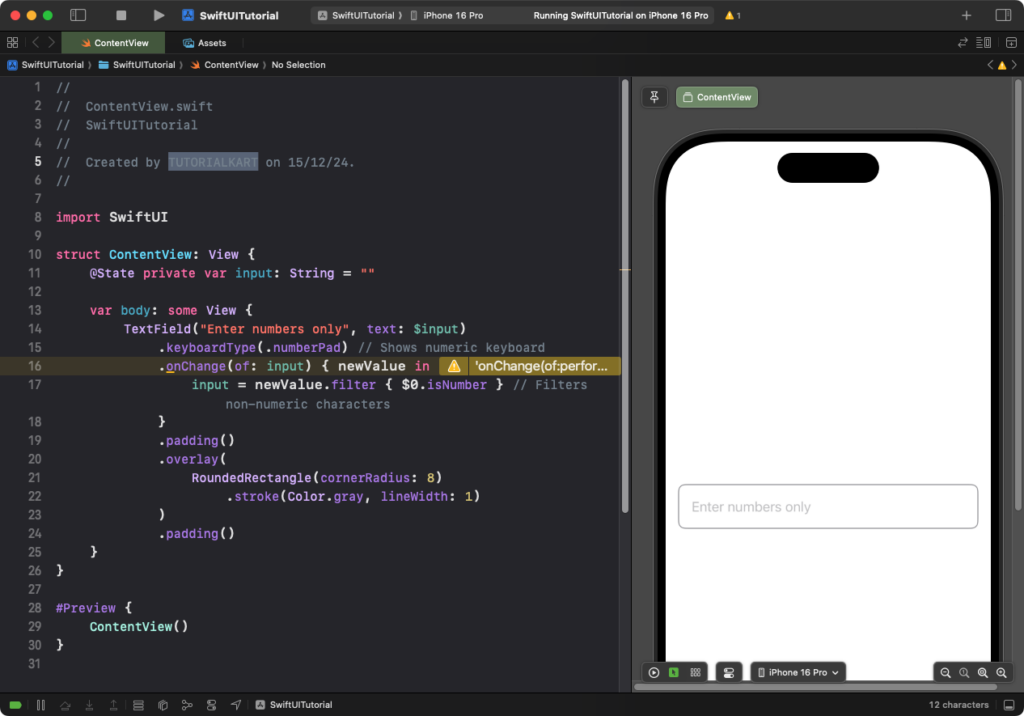
Explanation:
- The
.keyboardType(.numberPad)modifier shows a numeric keypad for input. - The
onChangemodifier filters out non-numeric characters from the input. - The
filter { $0.isNumber }ensures only numeric characters are allowed.
Result: The TextField accepts only numeric characters.
Example 2: Binding to an Integer
You can bind the TextField directly to an Int or Double using a Formatter to ensure the input is numeric:
Code Example:
import SwiftUI

struct ContentView: View {
    @State private var number: Int? = nil
    let formatter: NumberFormatter = {
        let formatter = NumberFormatter()
        formatter.numberStyle = .none
        return formatter
    }()

    var body: some View {
        TextField("Enter a number", value: $number, formatter: formatter)
            .keyboardType(.numberPad) // Shows numeric keyboard
            .padding()
            .overlay(
                RoundedRectangle(cornerRadius: 8)
                    .stroke(Color.gray, lineWidth: 1)
            )
            .padding()
    }
}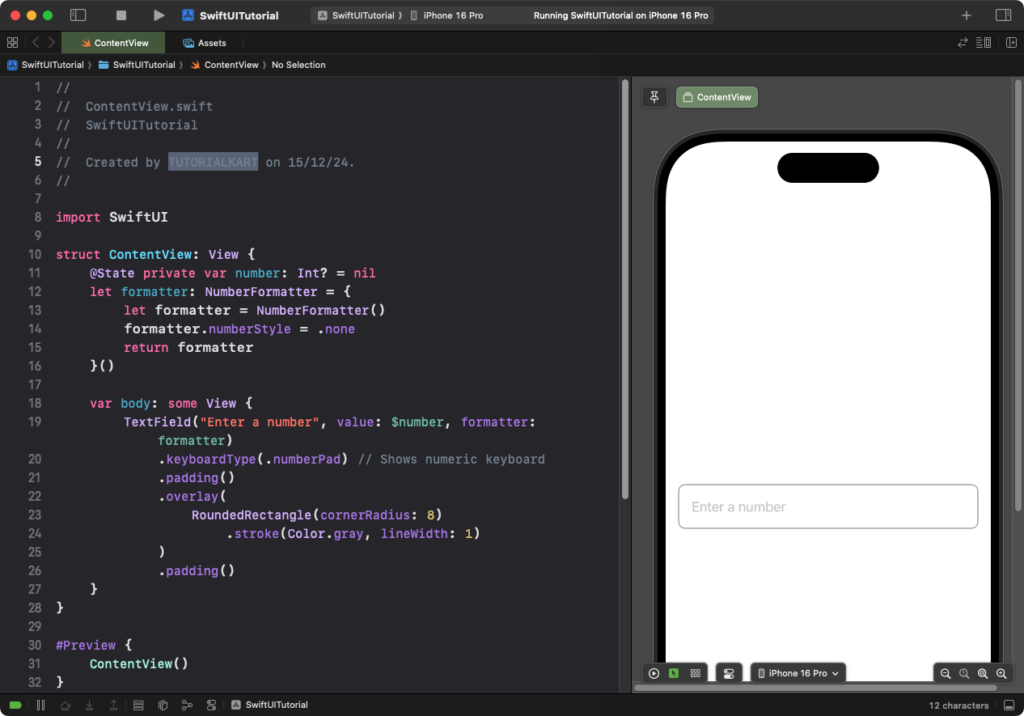
Explanation:
- The
TextFieldis bound to anInt?state variable. - A
NumberFormatterensures the input is formatted as an integer. - The
.keyboardType(.numberPad)modifier displays the numeric keyboard.
Result: The TextField accepts and validates numeric input, storing it as an integer.
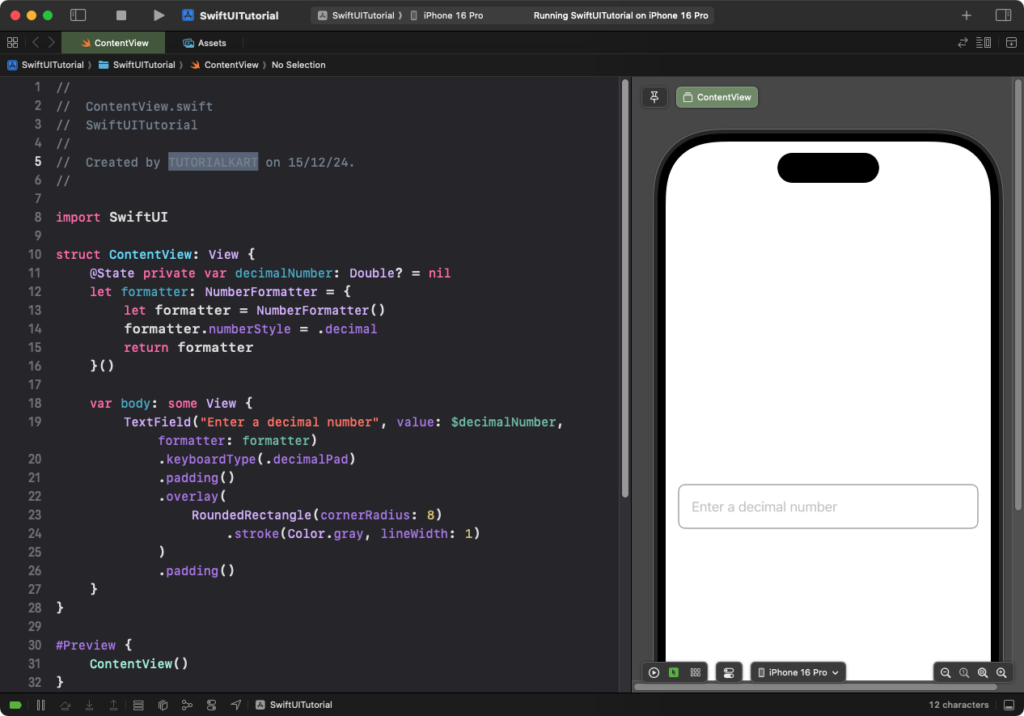
Example 3: Allowing Decimal Numbers
To accept decimal numbers, bind the TextField to a Double instead of an Int:
Code Example:
import SwiftUI

struct ContentView: View {
    @State private var decimalNumber: Double? = nil
    let formatter: NumberFormatter = {
        let formatter = NumberFormatter()
        formatter.numberStyle = .decimal
        return formatter
    }()

    var body: some View {
        TextField("Enter a decimal number", value: $decimalNumber, formatter: formatter)
            .keyboardType(.decimalPad) // Shows numeric keyboard with decimal point
            .padding()
            .overlay(
                RoundedRectangle(cornerRadius: 8)
                    .stroke(Color.gray, lineWidth: 1)
            )
            .padding()
    }
}
Explanation:
- The
TextFieldis bound to aDouble?state variable. - A
NumberFormatterformats the input as a decimal number. - The
.keyboardType(.decimalPad)modifier displays a numeric keyboard with a decimal point.
Result: The TextField accepts and validates decimal input, storing it as a double.
Conclusion
By combining modifiers like .keyboardType(), onChange, and formatters, you can effectively create a TextField in SwiftUI that accepts only numeric input. Whether you’re handling integers or decimals, these approaches ensure user input is validated and stored correctly.