How to Select a Database in MySQL
In MySQL, selecting a database is a primary step before executing any operations on its tables or other objects. Once you select a database, all subsequent queries will be executed within the context of that database.
In this tutorial, we will provide detailed steps to select a database using the MySQL command-line interface (CLI) and MySQL Workbench.
Prerequisites
Before selecting a database, ensure the following:
You have MySQL installed and running. You are connected to the MySQL server using a valid username and password. The database you want to select exists, and you have access privileges.
Using the MySQL Command-Line Interface
Follow these steps to select a database using the MySQL CLI:
Step 1: Connect to the MySQL Server
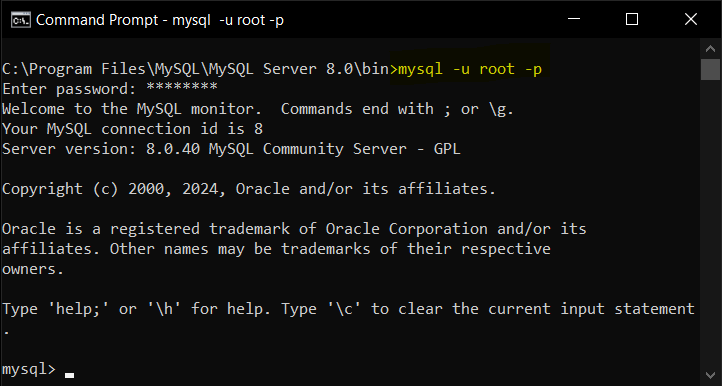
Open your terminal or command prompt and log in to the MySQL server using the following command:
mysql -u username -pReplace username with your MySQL username. Enter your password when prompted.
In this guide, we will login to the server as root (username is root) as shown in the following screenshot.
Step 2: View Available Databases
To see a list of all databases on the server, use the following command:
SHOW DATABASES;The output will display all databases you have permission to access. Identify the database you want to select.

Step 3: Select the Database
Use the USE statement to select the desired database:
USE database_name;Replace database_name with the name of the database you want to select. For example, let us select the database school.
USE school;Upon successful execution, you will see a message confirming that the database has been changed:
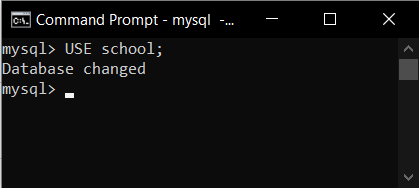
All subsequent queries will now apply to the selected database.
Step 4: Verify the Selected Database
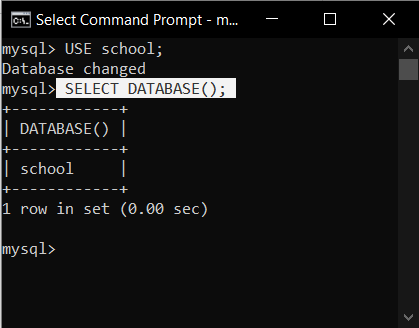
To verify the currently selected database, run the following command:
SELECT DATABASE();The output will display the name of the currently selected database, which is school.
Using MySQL Workbench
MySQL Workbench provides a graphical interface for selecting a database. Follow these steps:
Step 1: Launch MySQL Workbench
Open MySQL Workbench on your system and connect to the MySQL server by selecting the appropriate connection from the home screen.
Step 2: Open the Schemas Panel
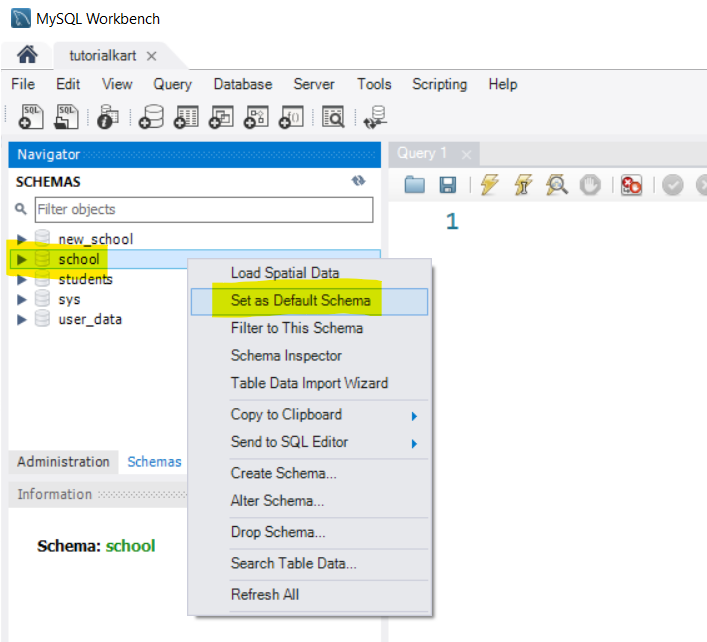
In the left-hand navigation panel, locate the “Schemas” section. This panel lists all available databases on the connected server.
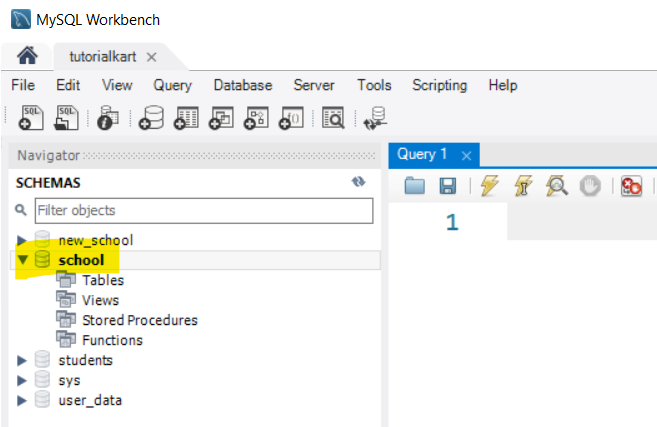
Step 3: Select the Database
Right-click on the database you want to select and choose Set as Default Schema. This action sets the chosen database as the active schema for subsequent queries.
Once the schema/database is set as default, then it appears in bold, as highlighted in the following screenshot.
Step 4: Verify the Selected Database
To confirm the selected database, use the Query Editor in MySQL Workbench. Run the following SQL command:
SELECT DATABASE();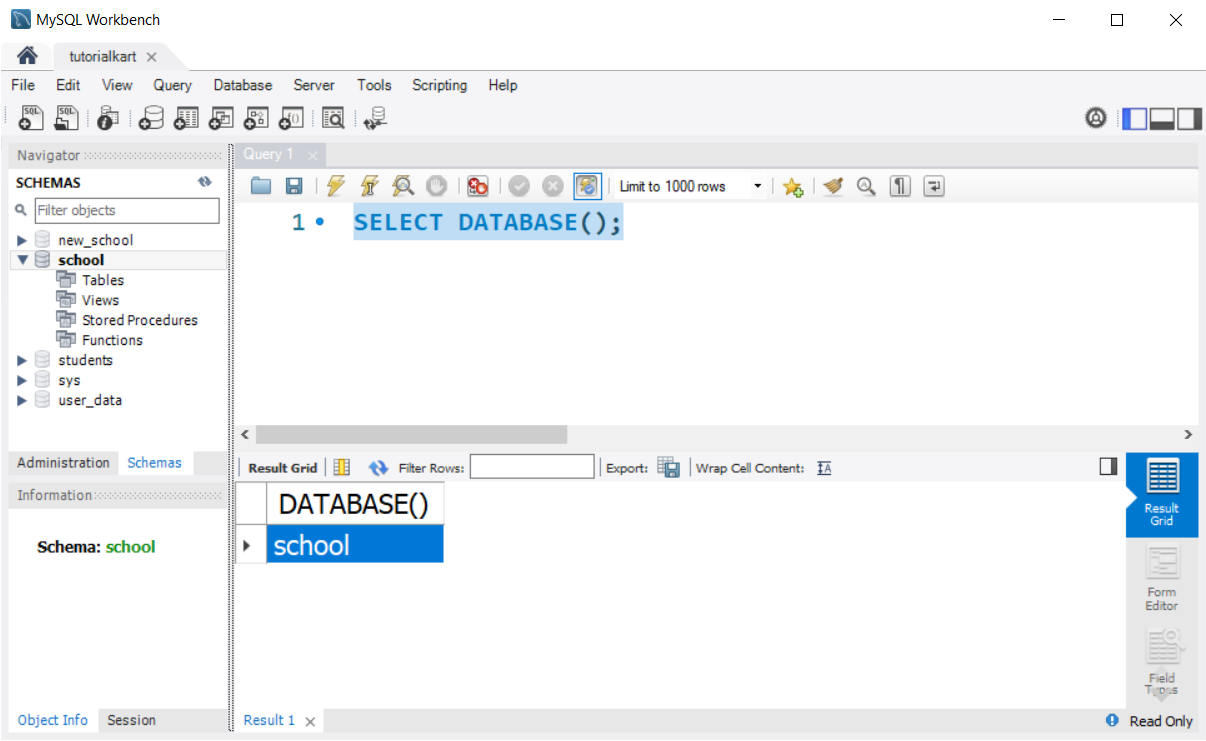
The output will display the currently selected database.