In this OpenCV Python tutorial, you will learn how to apply Gaussian blur for image smoothing with cv2.GaussianBlur(), how the kernel size and sigma values affect the result, and how to avoid common mistakes while blurring an image.
OpenCV Gaussian blur for image smoothing
Images can contain random noise from the camera sensor, compression, low light, or preprocessing steps. Gaussian blur is a common OpenCV smoothing technique used to reduce small pixel-level variations before operations such as thresholding, edge detection, contour detection, and feature extraction.
Gaussian smoothing replaces each pixel with a weighted average of nearby pixels. Pixels near the center of the kernel receive more weight than pixels farther away. This is why Gaussian blur usually keeps the image more natural than a simple average blur, while still softening sharp changes and noise.
For OpenCV Python projects, the main function is cv2.GaussianBlur(). It works on grayscale images, color images, and images with multiple channels. The output image has the same size and type as the input image.
Install OpenCV and NumPy before running the GaussianBlur examples
If OpenCV is not already installed in your Python environment, install the commonly used Python package with NumPy support.
pip install opencv-python numpyUse opencv-python-headless instead of opencv-python when you are running code on a server where display windows such as cv2.imshow() are not needed.
cv2.GaussianBlur() syntax for Gaussian image smoothing
OpenCV provides cv2.GaussianBlur() to apply Gaussian smoothing on a source image. The syntax is shown below.
dst = cv2.GaussianBlur(src, ksize, sigmaX[, dst[, sigmaY[, borderType=BORDER_DEFAULT]]] )In normal Python code, the following call style is easier to read because it makes the role of sigmaX, sigmaY, and borderType clear.
blurred = cv2.GaussianBlur(src, (5, 5), sigmaX=0)
blurred_with_sigma = cv2.GaussianBlur(src, (0, 0), sigmaX=3)
blurred_with_border = cv2.GaussianBlur(src, (5, 5), sigmaX=0, borderType=cv2.BORDER_DEFAULT)| Parameter | Description |
| src | Input image. This can be a grayscale image or a color image read with cv2.imread(). |
| dst | Output image after Gaussian smoothing. The destination image has the same size and type as the input image. |
| ksize | Gaussian kernel size as (width, height). Use positive odd values such as (3, 3), (5, 5), (9, 9), or (11, 11). If ksize is (0, 0), OpenCV computes the kernel size from sigma values. |
| sigmaX | Kernel standard deviation along the X-axis. Use 0 when you want OpenCV to calculate it from the kernel size. |
| sigmaY | Kernel standard deviation along the Y-axis. If sigmaY is 0, OpenCV uses the sigmaX value for sigmaY. |
| borderType | Controls how image boundaries are handled while the kernel overlaps the border area. Common choices include cv2.BORDER_DEFAULT, cv2.BORDER_REPLICATE, cv2.BORDER_REFLECT, and cv2.BORDER_CONSTANT. |
The most common beginner-friendly call is cv2.GaussianBlur(src, (5, 5), 0). Here, (5, 5) is the kernel size, and 0 tells OpenCV to calculate the sigma value automatically.
Choosing kernel size and sigma values in OpenCV GaussianBlur
The kernel size controls how many neighboring pixels are considered while calculating the blur. A larger kernel usually gives stronger smoothing. For example, (3, 3) gives a light blur, (5, 5) gives moderate smoothing, and (9, 9) or larger values produce a more visible blur.
The kernel width and height should be odd values. Avoid even values such as (4, 4) or (10, 10) in current OpenCV code because Gaussian kernels are centered around a middle pixel.
light_blur = cv2.GaussianBlur(src, (3, 3), 0)
medium_blur = cv2.GaussianBlur(src, (5, 5), 0)
strong_blur = cv2.GaussianBlur(src, (9, 9), 0)
You may also control blur strength through sigmaX. When ksize is (0, 0), OpenCV uses the sigma value to determine the filter size internally.
blur_sigma_1 = cv2.GaussianBlur(src, (0, 0), sigmaX=1)
blur_sigma_3 = cv2.GaussianBlur(src, (0, 0), sigmaX=3)
blur_sigma_5 = cv2.GaussianBlur(src, (0, 0), sigmaX=5)
For repeatable results, especially in production image-processing pipelines, specify both the kernel size and sigma values instead of depending entirely on automatic calculation.
Gaussian blur examples in OpenCV Python
Apply Gaussian blur on an image with cv2.GaussianBlur()
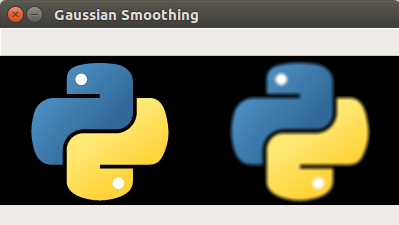
In this example, we will read an image, and apply Gaussian blur to the image using cv2.GaussianBlur() function.
Python Program
import cv2
import numpy

# read image
src = cv2.imread('/home/img/python.png', cv2.IMREAD_UNCHANGED)

# apply guassian blur on src image
dst = cv2.GaussianBlur(src,(5,5),cv2.BORDER_DEFAULT)

# display input and output image
cv2.imshow("Gaussian Smoothing",numpy.hstack((src, dst)))
cv2.waitKey(0) # waits until a key is pressed
cv2.destroyAllWindows() # destroys the window showing image
Output
In the program above, the third positional argument is interpreted as sigmaX. For most new code, it is clearer to pass 0 for automatic sigma calculation, as shown below.
dst = cv2.GaussianBlur(src, (5, 5), 0)Compare stronger Gaussian blur by changing the kernel size
Now let us increase the Kernel size and observe the result.
dst = cv2.GaussianBlur(src,(10,10),cv2.BORDER_DEFAULT)Output
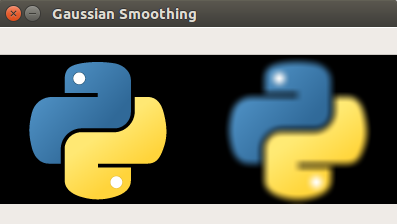
In current OpenCV Python code, prefer an odd kernel size such as (9, 9) or (11, 11) when you want stronger Gaussian smoothing. Even kernel sizes may raise an assertion error because the kernel needs a center pixel.
dst = cv2.GaussianBlur(src, (11, 11), 0)You may change values of ksize, sigmaX, sigmaY, and borderType and compare the output for your own image.
Save the Gaussian blurred image instead of only displaying it
When you are processing images in a script, you may want to write the blurred image to disk instead of showing it in a window.
import cv2

src = cv2.imread('/home/img/python.png')

if src is None:
    raise FileNotFoundError('Input image was not found.')

blurred = cv2.GaussianBlur(src, (5, 5), 0)
cv2.imwrite('/home/img/python-gaussian-blur.png', blurred)
This approach is useful when running image preprocessing as part of a larger computer vision workflow or when using a notebook or server environment where GUI windows are not available.
Gaussian blur on grayscale images in OpenCV Python
For many computer vision tasks, the image is first converted to grayscale and then smoothed. This is common before thresholding, Canny edge detection, and contour detection because noise in a grayscale image can create small false edges or broken contours.
import cv2

src = cv2.imread('/home/img/python.png')

if src is None:
    raise FileNotFoundError('Input image was not found.')

gray = cv2.cvtColor(src, cv2.COLOR_BGR2GRAY)
blurred_gray = cv2.GaussianBlur(gray, (5, 5), 0)

cv2.imshow('Gray Gaussian Blur', blurred_gray)
cv2.waitKey(0)
cv2.destroyAllWindows()
If you need to preserve color information, blur the original BGR image. If the next operation works only on intensity values, convert to grayscale first and then apply Gaussian smoothing.
When to use Gaussian blur instead of average blur or median blur
| Blur method | Best suited for | OpenCV function |
| Gaussian blur | Reducing natural image noise while keeping the smoothing visually balanced. | cv2.GaussianBlur() |
| Average blur | Simple smoothing where all pixels in the kernel can have equal weight. | cv2.blur() |
| Median blur | Salt-and-pepper noise, small white or black dots, and isolated pixel spikes. | cv2.medianBlur() |
| Bilateral filter | Smoothing while trying to preserve edges more strongly than Gaussian blur. | cv2.bilateralFilter() |
Gaussian blur is a good default choice when you want general noise reduction before further processing. Median blur is usually better for salt-and-pepper noise, while bilateral filtering is useful when edge preservation is more important than speed.
Common cv2.GaussianBlur mistakes and quick fixes
- Using an even kernel size: use odd values such as
(3, 3),(5, 5), or(11, 11). - Passing border type as the third argument: the third positional argument is
sigmaX. Use keyword arguments when passingborderType. - Making the image too blurry: reduce the kernel size or reduce
sigmaX. - Getting a blank or error result: check whether
cv2.imread()returnedNonebecause the file path may be wrong. - Using
cv2.imshow()on a server: save the image withcv2.imwrite()or use a notebook display method instead.
Gaussian blur implementation checklist for OpenCV Python
- Confirm that the input image path is correct and
cv2.imread()does not returnNone. - Use odd kernel sizes for
ksize, for example(5, 5)for moderate smoothing. - Use
sigmaX=0when you want OpenCV to calculate sigma from the kernel size. - Use keyword arguments when setting
borderTypeso the code is easy to read. - Compare at least two kernel sizes on the actual input image because blur strength depends on image resolution and noise level.
FAQs on OpenCV Python Gaussian blur
What is Gaussian blur in OpenCV Python?
Gaussian blur is an image smoothing technique that reduces noise by replacing each pixel with a weighted average of nearby pixels. In OpenCV Python, it is applied with cv2.GaussianBlur().
What kernel size should I use for cv2.GaussianBlur()?
Use odd kernel sizes such as (3, 3), (5, 5), (7, 7), or (11, 11). Smaller kernels give light smoothing, while larger kernels create stronger blur.
What does sigmaX=0 mean in GaussianBlur?
When sigmaX is 0, OpenCV calculates the standard deviation from the kernel size. This is a common choice when you want a simple Gaussian blur without manually tuning sigma.
Why does cv2.GaussianBlur fail with an even kernel size?
Gaussian kernels need a center pixel, so the kernel width and height should be odd. Use values such as (5, 5) or (9, 9) instead of (10, 10).
Is Gaussian blur the same as average blur in OpenCV?
No. Average blur gives equal weight to all pixels in the kernel, while Gaussian blur gives more weight to pixels near the center. This usually produces smoother and more natural-looking results.
OpenCV GaussianBlur reference links
For more details on OpenCV filtering functions, refer to the OpenCV image filtering documentation and the OpenCV Python image filtering tutorial.
Key takeaways for OpenCV Gaussian smoothing
In this OpenCV Python Tutorial, we learned how to blur or smooth an image using the Gaussian filter. Use cv2.GaussianBlur(src, (5, 5), 0) for a simple starting point, choose odd kernel sizes, and adjust sigmaX or ksize when you need lighter or stronger smoothing.