In this OpenCV Python tutorial, you will learn how to resize an image using cv2.resize(). The examples cover resizing by percentage, resizing to fixed width and height, preserving aspect ratio, stretching an image intentionally, and choosing a suitable interpolation method for downscaling or upscaling.
OpenCV Python cv2.resize() for Image Resizing
Resizing an image means changing its pixel dimensions. You can change the width alone, the height alone, or both width and height. In most practical cases, you should preserve the aspect slot gacor ratio so that the resized image does not look stretched. OpenCV provides the cv2.resize() function for these resizing operations.
Before resizing, remember that OpenCV image shape is returned as (height, width, channels), but the resize destination size dsize must be given as (width, height). This difference is a common source of wrong output dimensions.
Syntax of cv2.resize() in OpenCV Python
The syntax of resize function in OpenCV is
cv2.resize(src, dsize[, dst[, fx[, fy[, interpolation]]]])where
| Parameter | Description |
| src | [required] source/input image |
| dsize | [required] desired size for the output image |
| fx | [optional] scale factor along the horizontal axis |
| fy | [optional] scale factor along the vertical axis |
| interpolation | [optional] flag that takes one of the following methods. INTER_NEAREST – a nearest-neighbor interpolation INTER_LINEAR – a bilinear interpolation (used by default) INTER_AREA – resampling using pixel area relation. It may be a preferred method for image decimation, as it gives moire’-free results. But when the image is zoomed, it is similar to the INTER_NEAREST method. INTER_CUBIC – a bicubic interpolation over 4×4 pixel neighborhood INTER_LANCZOS4 – a Lanczos interpolation over 8×8 pixel neighborhood |
cv2.resize() dsize, fx, and fy Rules
You can resize an image in OpenCV by passing either a target size through dsize, or scale factors through fx and fy.
- Use
dsize=(width, height)when you already know the exact output dimensions. - Use
fxandfywhen you want to scale the image by a ratio, such as 0.5 for half size or 2.0 for double size. - If you pass a non-zero
dsize, OpenCV uses that size and does not needfxandfy. - If you want OpenCV to calculate the output size from
fxandfy, passdsize=Noneordsize=(0, 0).
# Resize to exact size: dsize is (width, height)
resized = cv2.resize(img, (300, 200), interpolation=cv2.INTER_AREA)

# Resize by scale factors: fx and fy are ratios
resized = cv2.resize(img, None, fx=0.5, fy=0.5, interpolation=cv2.INTER_AREA)
cv2.resize() Examples for Downscaling, Upscaling, and Fixed Dimensions
Resizing an image can be done in many ways. We will look into examples demonstrating the following resize operations.
- Preserve Aspect Ratio (height to width ratio of image is preserved)
- Downscale (Decrease the size of the image)
- Upscale (Increase the size of the image)
- Do not preserve Aspect Ratio
- Resize only the width (Increase or decrease the width of the image keeping height unchanged)
- Resize only the height slot (Increase or decrease the height of the image keeping width unchanged)
- Resize to specific width and height
Following is the original image with dimensions (149,200,4) (height, width, number of channels) on which we shall experiment on :

1. Downscale Image with cv2.resize() and Preserve Aspect Ratio
In the following example, scale_percent value holds the percentage by which image has to be scaled. Providing a value <100 downscales the image provided. We slot88 will use this scale_percent value along with original image’s dimensions to calculate the width and height of output image.
For shrinking an image, cv2.INTER_AREA is commonly used because it is designed for image decimation and usually gives better results than nearest-neighbor interpolation for reduced images.
resize-image.py
import cv2

img = cv2.imread('/home/img/python.png', cv2.IMREAD_UNCHANGED)

print('Original Dimensions : ',img.shape)

scale_percent = 60 # percent of original size
width = int(img.shape[1] * scale_percent / 100)
height = int(img.shape[0] * scale_percent / 100)
dim = (width, height)

# resize image
resized = cv2.resize(img, dim, interpolation = cv2.INTER_AREA)

print('Resized Dimensions : ',resized.shape)

cv2.imshow("Resized image", resized)
cv2.waitKey(0)
cv2.destroyAllWindows()
Output
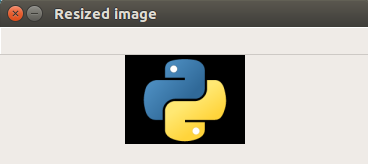
Original Dimensions :  (149, 200, 4)
Resized Dimensions :  (89, 120, 4)
The original image with dimensions [149 x 200 x 4] has been resized to [89, 120, 4] using resize() function. The aspect ratio is preserved because both width and height were multiplied by the same scale percentage.
2. Upscale Image with cv2.resize() and Preserve Aspect Ratio
In the following example, scale_percent value holds the percentage by which image has to be scaled. Providing a value >100 upscales the image provided. spaceman slot
Upscaling increases the number of pixels in the output image. It can make the image larger, but it cannot recover details that were not present in the original image. For many upscaling cases, cv2.INTER_CUBIC or cv2.INTER_LINEAR may produce smoother results than nearest-neighbor interpolation.
resize-image.py
import cv2

img = cv2.imread('/home/img/python.png', cv2.IMREAD_UNCHANGED)

print('Original Dimensions : ',img.shape)

scale_percent = 220 # percent of original size
width = int(img.shape[1] * scale_percent / 100)
height = int(img.shape[0] * scale_percent / 100)
dim = (width, height)

# resize image
resized = cv2.resize(img, dim, interpolation = cv2.INTER_AREA)

print('Resized Dimensions : ',resized.shape)

cv2.imshow("Resized image", resized)
cv2.waitKey(0)
cv2.destroyAllWindows()
Output
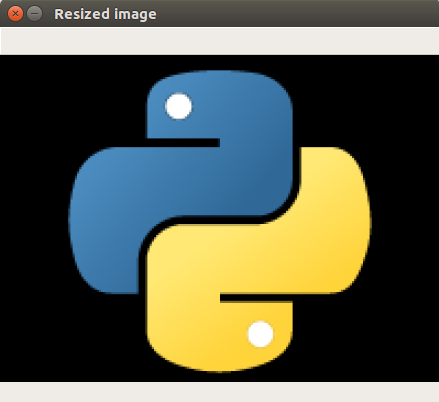
Original Dimensions :  (149, 200, 4)
Resized Dimensions :  (327, 440, 4)
The resized image is larger because both original dimensions were multiplied by 220 percent. The output shape is still displayed as (height, width, channels).
3. Resize Only Width with cv2.resize() Without Preserving Aspect Ratio
In this example, we provided a specific value in pixels for width and left the height unchanged. This changes the aspect ratio, so use this approach only when stretching or squeezing the image is acceptable.
resize-image.py
import cv2

img = cv2.imread('/home/img/python.png', cv2.IMREAD_UNCHANGED)

print('Original Dimensions : ',img.shape)

width = 440
height = img.shape[0] # keep original height
dim = (width, height)

# resize image
resized = cv2.resize(img, dim, interpolation = cv2.INTER_AREA)

print('Resized Dimensions : ',resized.shape)

cv2.imshow("Resized image", resized)
cv2.waitKey(0)
cv2.destroyAllWindows()
Output
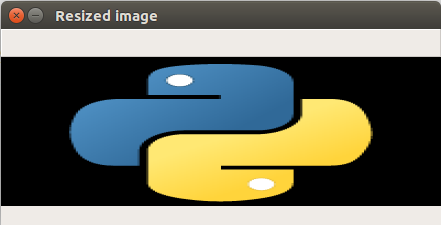
Original Dimensions :  (149, 200, 4)
Resized Dimensions :  (149, 440, 4)
As we have increased only the width, the output image looks stretched horizontally.
4. Resize Only Height with cv2.resize() Without Preserving Aspect Ratio
In the following example, scale_percent value holds the percentage by which height has to be scaled. Or you may also provide a specific value in pixels. slot garansi kekalahan
Here, the width remains the same and only the height is changed. This also changes the aspect ratio, so the output image appears vertically stretched.
resize-image.py
import cv2

img = cv2.imread('/home/img/python.png', cv2.IMREAD_UNCHANGED)

print('Original Dimensions : ',img.shape)

width = img.shape[1] # keep original width
height = 440
dim = (width, height)

# resize image
resized = cv2.resize(img, dim, interpolation = cv2.INTER_AREA)

print('Resized Dimensions : ',resized.shape)

cv2.imshow("Resized image", resized)
cv2.waitKey(0)
cv2.destroyAllWindows()
Output
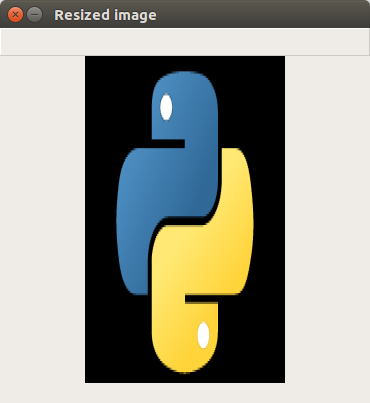
Original Dimensions :  (149, 200, 4)
Resized Dimensions :  (440, 200, 4)
As we have increased only the height, the output image looks stretched vertically.
5. Resize Image to Specific Width and Height in OpenCV Python
In the following example, we shall provide specific value in pixels for both width and height.
When you specify both dimensions directly, the output image always uses those dimensions. If the target width and height do not match the original aspect ratio, the image will be distorted.
resize-image.py
import cv2

img = cv2.imread('/home/img/python.png', cv2.IMREAD_UNCHANGED)

print('Original Dimensions : ',img.shape)

width = 350
height = 450
dim = (width, height)

# resize image
resized = cv2.resize(img, dim, interpolation = cv2.INTER_AREA)

print('Resized Dimensions : ',resized.shape)

cv2.imshow("Resized image", resized)
cv2.waitKey(0)
cv2.destroyAllWindows()
Output
Original Dimensions :  (149, 200, 4)
Resized Dimensions :  (450, 350, 4)
Preserve Aspect Ratio When Resizing to a Target Width or Height
Many resizing tasks start with only one target dimension. For example, you may want every image to be 300 pixels wide while keeping its natural proportions. In that case, calculate the other dimension from the original width-height ratio.
Resize Image to a Fixed Width and Calculate Height Automatically
import cv2

img = cv2.imread('/home/img/python.png', cv2.IMREAD_UNCHANGED)

target_width = 300
ratio = target_width / img.shape[1]
target_height = int(img.shape[0] * ratio)

resized = cv2.resize(img, (target_width, target_height), interpolation=cv2.INTER_AREA)

print('Original Dimensions : ', img.shape)
print('Resized Dimensions : ', resized.shape)
Original Dimensions : (149, 200, 4)
Resized Dimensions : (223, 300, 4)Resize Image to a Fixed Height and Calculate Width Automatically
import cv2

img = cv2.imread('/home/img/python.png', cv2.IMREAD_UNCHANGED)

target_height = 300
ratio = target_height / img.shape[0]
target_width = int(img.shape[1] * ratio)

resized = cv2.resize(img, (target_width, target_height), interpolation=cv2.INTER_AREA)

print('Original Dimensions : ', img.shape)
print('Resized Dimensions : ', resized.shape)
Original Dimensions : (149, 200, 4)
Resized Dimensions : (300, 402, 4)Choose the Right cv2.resize() Interpolation Method
The interpolation method controls how OpenCV calculates pixel values in the resized image. The best choice depends on whether you are shrinking or enlarging the image and whether speed or visual quality matters more.
| Resize case | Common interpolation choice | Reason |
|---|---|---|
| Downscale an image | cv2.INTER_AREA | Usually suitable for reducing image size with fewer visual artifacts. |
| Upscale an image quickly | cv2.INTER_LINEAR | Default method and a good general-purpose option. |
| Upscale with smoother result | cv2.INTER_CUBIC | Uses a larger pixel neighborhood and may look smoother, but can be slower. |
| Pixel-art or label masks | cv2.INTER_NEAREST | Preserves hard edges and avoids creating blended class values. |
Common cv2.resize() Mistakes in OpenCV Python
- Passing dimensions in the wrong order:
img.shapegives height first, butdsizeexpects width first. - Ignoring aspect ratio: changing only width or only height can stretch the image unless that is the intended result.
- Using the same interpolation for every case: shrinking and enlarging often benefit from different interpolation choices.
- Not checking whether the image loaded: if
cv2.imread()returnsNone, resizing will fail. - Expecting upscaling to restore detail: resizing to a larger size increases dimensions, but it does not add real image detail.
Safe cv2.resize() Example with imread Check
import cv2

img = cv2.imread('/home/img/python.png', cv2.IMREAD_UNCHANGED)

if img is None:
    raise FileNotFoundError('Image file could not be loaded. Check the file path.')

resized = cv2.resize(img, (300, 200), interpolation=cv2.INTER_AREA)
cv2.imwrite('/home/img/python-resized.png', resized)
OpenCV Resize Image FAQs
What is the correct order of width and height in cv2.resize()?
In cv2.resize(), the destination size is given as (width, height). This is different from img.shape, which returns image dimensions as (height, width, channels).
How do I resize an image without changing its aspect ratio in OpenCV?
Calculate the new width and height using the same scale factor, or calculate one dimension from the other using the original aspect ratio. Then pass the calculated size to cv2.resize().
Which interpolation should I use for downscaling an image?
For downscaling, cv2.INTER_AREA is usually a suitable choice because it is meant for image decimation and often gives better visual results when reducing image size.
Can cv2.resize() improve image quality when upscaling?
cv2.resize() can make an image larger, but it cannot recreate missing detail from the original image. Interpolation methods such as INTER_LINEAR or INTER_CUBIC may make the enlarged image look smoother.
Why does my resized OpenCV image look stretched?
The image looks stretched when the new width and height do not follow the original aspect ratio. Preserve the ratio between width and height to avoid distortion.
Editorial QA Checklist for cv2.resize() Tutorial
- Confirm that every
dsizeexample uses(width, height), not(height, width). - Check that output shapes are explained as
(height, width, channels). - Verify that aspect-ratio examples scale width and height consistently.
- Keep separate guidance for downscaling, upscaling, fixed-width resizing, and fixed-height resizing.
- Use
cv2.INTER_AREA,cv2.INTER_LINEAR,cv2.INTER_CUBIC, andcv2.INTER_NEARESTonly in contexts where their behavior is explained.
OpenCV Python cv2.resize() Summary
In this OpenCV Python Tutorial, we learned how to resize an image in Python using OpenCV resize() function. Use dsize=(width, height) for exact output dimensions, calculate one dimension from the other to preserve aspect ratio, and choose interpolation based on whether you are downscaling or upscaling. joker123