Node.js Examples for Beginners and Backend Practice
Node.js examples in this tutorial show how to run JavaScript outside the browser, create custom modules, work with files, parse JSON and URLs, connect to MySQL, and create a simple HTTP web server. The examples start with basic console programs and then move to common backend tasks that you can practise in small files.
Node.js uses JavaScript on the server side and provides built-in modules such as fs, http, and url. Before running the programs below, install Node.js, open a terminal in your project folder, and check the installed version.
node -v
npm -v
Each example can be saved as a separate .js file and executed with the node filename.js command. For MySQL examples, you also need a running MySQL server, a database, and the required npm package.
Node.js example topics covered in this tutorial
- Run a basic Node.js program from the terminal.
- Create and use a custom Node.js module.
- Create, read, write, and delete files using the
fsmodule. - Connect Node.js to MySQL and run SELECT, WHERE, ORDER BY, INSERT, UPDATE, and DELETE queries.
- Read rows from a MySQL result object.
- Parse URL parameters and JSON data.
- Create a simple HTTP server with the built-in
httpmodule.
Recommended folder setup for these Node.js programs
Keep the files for this tutorial in one folder so that relative imports such as require('./calculator') work correctly. A simple practice folder can look like this:
nodejs-examples/
├── helloworld.js
├── calculator.js
├── moduleExample.js
├── createFileExample.js
├── readFileExample.js
├── deleteFile.js
├── httpWebServer.js
└── package.json
For examples that use third-party packages, initialise a project first.
npm init -yNode.js Example 1 – Simple Node.js Example
Following is a simple Node.js Example to print a message to console.
helloworld.js
console.log("Hello World!")Output
$ node helloworld.js
Hi there! This is Node.js!
Run the file with node helloworld.js. The text printed in the terminal depends on the string passed to console.log(). For the exact program above, the output would be Hello World!.
Node.js Example – Create a Module
Following is Node.js Example where we create a Calculator Node.js Module with functions add, subtract and multiply. And use the Calculator module in another Node.js file.
Save the first file as calculator.js. It exports three functions. Save the second file as moduleExample.js. It imports the calculator module and calls those functions.
// Returns addition of two numbers
exports.add = function (a, b) {
    return a+b;
};

// Returns difference of two numbers
exports.subtract = function (a, b) {
    return a-b;
};

// Returns product of two numbers
exports.multiply = function (a, b) {
    return a*b;
};
var calculator = require('./calculator');

var a=10, b=5;

console.log("Addition : "+calculator.add(a,b));
console.log("Subtraction : "+calculator.subtract(a,b));
console.log("Multiplication : "+calculator.multiply(a,b));
$ node moduleExample.js
Addition : 15
Subtraction : 5
Multiplication : 50A module helps you split code into smaller files. In CommonJS, exports exposes values from one file and require() imports them in another file. This keeps larger Node.js programs easier to maintain.
Modern Node.js module example with module.exports
The older examples above use exports.add. Another common style is to export an object using module.exports. This is useful when you want to group related functions clearly.
// calculator.js
function add(a, b) {
  return a + b;
}

function subtract(a, b) {
  return a - b;
}

module.exports = {
  add,
  subtract
};// app.js
const calculator = require('./calculator');
console.log(calculator.add(10, 5));
console.log(calculator.subtract(10, 5));15
5Node.js Example – Create a File
Following Node.js Example creates a file with data provided.
// include node fs module
var fs = require('fs');
var data ='Learn Node FS module';

// writeFile function with filename, content and callback function
fs.writeFile('newfile.txt', data, function (err) {
  if (err) throw err;
  console.log('File is created successfully.');
});
Run the program using node command in terminal or command prompt :
$ node createFileExample.js
File is created successfully.
The file should be created next to your example node.js program with the content ‘Learn Node FS module’.
fs.writeFile() replaces the file content if the file already exists. Use it carefully when working with important files. For appending new content without replacing existing content, use fs.appendFile().
const fs = require('fs');

fs.appendFile('newfile.txt', '\nSecond line added later.', function (err) {
  if (err) throw err;
  console.log('Content appended successfully.');
});
Node.js Example – Read a File
The fs.readFile() function reads a file asynchronously. The callback receives an error object and the file data. If you pass an encoding such as utf8, Node.js returns a string instead of a Buffer.
// include file system module
var fs = require('fs');

// read file sample.html
fs.readFile('sample.html',
	// callback function that is called when reading file is done
	function(err, data) {
		if (err) throw err;
		// data is a buffer containing file content
		console.log(data.toString('utf8'))
});
Run the program using node command in terminal or command prompt :
$ node readFileExample.js
<html>
<body>
<h1>Header</h1>
<p>I have learnt to read a file in Node.js.</p>
</body>
</html>
You can also pass the encoding directly to readFile().
const fs = require('fs');

fs.readFile('sample.html', 'utf8', function (err, data) {
  if (err) throw err;
  console.log(data);
});
Node.js Example – Delete a File
make sure there is a file named ‘sample.txt’ next to the node.js example program.
// include node fs module
var fs = require('fs');

// delete file named 'sample.txt'
fs.unlink('sample.txt', function (err) {
	if (err) throw err;
	// if no error, file has been deleted successfully
	console.log('File deleted!');
});
Run the program using node command in terminal or command prompt :
$ node deleteFile.js
File deleted!
The file is successfully deleted.
If the file does not exist, fs.unlink() returns an error. In production code, handle the error instead of immediately throwing it, especially when the file may already have been removed.
const fs = require('fs');

fs.unlink('sample.txt', function (err) {
  if (err) {
    console.log('File could not be deleted:', err.message);
    return;
  }

  console.log('File deleted!');
});
Node.js Example – Write to a File
In this example, we shall write content, “Hello !” , to a text file sample.txt.
// include file system module

var fs = require('fs');

var data = "Hello !"

// write data to file sample.html
fs.writeFile('sample.txt',data,
	// callback function that is called after writing file is done
	function(err) {
		if (err) throw err;
		// if no error
		console.log("Data is written to file successfully.")
});
When the above program is run in Terminal,
arjun@arjun-VPCEH26EN:~/workspace/nodejs$ node nodejs-write-to-file-example.js
Data is written to file successfully.
Use writeFile() when you want to create a new file or replace the entire content of an existing file. Use appendFile() when you want to add content to the end of a file.
Installing the MySQL package for Node.js database examples
The MySQL examples below use the mysql package. Install it inside your Node.js project folder before running the database programs.
npm install mysqlFor safer practice, create a separate test database and table. Do not run INSERT, UPDATE, or DELETE examples on a production database.
CREATE DATABASE studentsDB;

USE studentsDB;

CREATE TABLE students (
  name VARCHAR(50),
  rollno INT,
  marks INT
);
NodeJS Example – Connect to MySQL Database
This Node.js MySQL example creates a connection object and connects to a local MySQL server. Replace the host, user, password, and database details with your own local setup.
// include mysql module
var mysql = require('mysql');

// create a connection variable with the details required
var con = mysql.createConnection({
  host: "localhost",	// ip address of server running mysql
  user: "arjun",	// user name to your mysql database
  password: "password"	// corresponding password
});

// connect to the database.
con.connect(function(err) {
  if (err) throw err;
  console.log("Connected!");
});
$ node connectToMySQL.js
Connected!
In real applications, avoid hard-coding database passwords in source files. Store credentials in environment variables or a secure configuration system.
const mysql = require('mysql');

const con = mysql.createConnection({
  host: process.env.DB_HOST,
  user: process.env.DB_USER,
  password: process.env.DB_PASSWORD,
  database: process.env.DB_NAME
});
NodeJS Example – SELECT FROM Table
The SELECT query reads records from a table. The callback receives the result rows and field metadata after the query is completed.
// Node.js MySQL SELECT FROM query Example
// include mysql module
var mysql = require('mysql');

// create a connection variable with the required details
var con = mysql.createConnection({
  host: "localhost",	// ip address of server running mysql
  user: "arjun",	// user name to your mysql database
  password: "password",	// corresponding password
  database: "studentsDB" // use the specified database
});

// make to connection to the database.
con.connect(function(err) {
  if (err) throw err;
  // if connection is successful
  con.query("SELECT * FROM students", function (err, result, fields) {
	// if any error while executing above query, throw error
    if (err) throw err;
	// if there is no error, you have the result
    console.log(result);
  });
});
$ node selectFromTable.js
[ RowDataPacket { name: 'John', rollno: 1, marks: 74 },
RowDataPacket { name: 'Arjun', rollno: 2, marks: 74 },
RowDataPacket { name: 'Prasanth', rollno: 3, marks: 77 },
RowDataPacket { name: 'Adarsh', rollno: 4, marks: 78 },
RowDataPacket { name: 'Raja', rollno: 5, marks: 94 },
RowDataPacket { name: 'Sai', rollno: 6, marks: 84 },
RowDataPacket { name: 'Ross', rollno: 7, marks: 54 },
RowDataPacket { name: 'Monica', rollno: 8, marks: 86 },
RowDataPacket { name: 'Lee', rollno: 9, marks: 98 },
RowDataPacket { name: 'Bruce', rollno: 10, marks: 92 },
RowDataPacket { name: 'Sukumar', rollno: 11, marks: 99 } ]NodeJS Example – SELECT from Table with WHERE clause
We shall apply a filter based on marks and fetch only those records with marks greater than 90.
// include mysql module
var mysql = require('mysql');

// create a connection variable with the required details
var con = mysql.createConnection({
  host: "localhost",	// ip address of server running mysql
  user: "arjun",	// user name to your mysql database
  password: "password",	// corresponding password
  database: "studentsDB" // use the specified database
});

// make to connection to the database.
con.connect(function(err) {
  if (err) throw err;
  // if connection is successful
  con.query("SELECT * FROM students where marks>90", function (err, result, fields) {
	// if any error while executing above query, throw error
    if (err) throw err;
	// if there is no error, you have the result
    console.log(result);
  });
});
Open a terminal from the location of above .js file and run selectFromWhere.js Node.js MySQL example program.
arjun@arjun-VPCEH26EN:~/workspace/nodejs$ node selectFromWhere.js
[ RowDataPacket { name: 'Raja', rollno: 5, marks: 94 },
  RowDataPacket { name: 'Lee', rollno: 9, marks: 98 },
  RowDataPacket { name: 'Bruce Wane', rollno: 10, marks: 92 },
  RowDataPacket { name: 'Sukumar', rollno: 11, marks: 99 } ]
When a value comes from user input, use placeholders instead of joining strings directly into SQL. This helps avoid SQL injection bugs.
const minimumMarks = 90;

con.query(
  'SELECT * FROM students WHERE marks > ?',
  [minimumMarks],
  function (err, result) {
    if (err) throw err;
    console.log(result);
  }
);
NodeJS Example – ORDER entries BY a column
An example to sort entries in ascending order w.r.t a column.
// include mysql module
var mysql = require('mysql');

// create a connection variable with the required details
var con = mysql.createConnection({
  host: "localhost",	// ip address of server running mysql
  user: "arjun",	// user name to your mysql database
  password: "password",	// corresponding password
  database: "studentsDB" // use the specified database
});

// make to connection to the database.
con.connect(function(err) {
  if (err) throw err;
  // if connection is successful
  con.query("SELECT * FROM students ORDER BY marks", function (err, result, fields) {
	// if any error while executing above query, throw error
    if (err) throw err;
	// if there is no error, you have the result
    console.log(result);
  });
});
Run the above Node.js MySQL ORDER BY example program.
arjun@arjun-VPCEH26EN:~/workspace/nodejs$ node AscOrderExample.js
[ RowDataPacket { name: 'Ross', rollno: 7, marks: 54 },
  RowDataPacket { name: 'John', rollno: 1, marks: 74 },
  RowDataPacket { name: 'Arjun', rollno: 2, marks: 74 },
  RowDataPacket { name: 'Prasanth', rollno: 3, marks: 77 },
  RowDataPacket { name: 'Adarsh', rollno: 4, marks: 78 },
  RowDataPacket { name: 'Sai', rollno: 6, marks: 84 },
  RowDataPacket { name: 'Monica Gellar', rollno: 8, marks: 86 },
  RowDataPacket { name: 'Bruce Wane', rollno: 10, marks: 92 },
  RowDataPacket { name: 'Raja', rollno: 5, marks: 94 },
  RowDataPacket { name: 'Lee', rollno: 9, marks: 98 },
  RowDataPacket { name: 'Sukumar', rollno: 11, marks: 99 } ]
The records are sorted in ascending order with respect to marks column.
To sort in descending order, add DESC after the column name.
SELECT * FROM students ORDER BY marks DESC;NodeJS Example – INSERT entries INTO Table
This Node.js MySQL example inserts one record into the students table.
// include mysql module
var mysql = require('mysql');

// create a connection variable with the required details
var con = mysql.createConnection({
  host: "localhost",	// ip address of server running mysql
  user: "arjun",	// user name to your mysql database
  password: "password",	// corresponding password
  database: "studentsDB" // use the specified database
});

// make to connection to the database.
con.connect(function(err) {
  if (err) throw err;
  // if connection is successful
  con.query("INSERT INTO students (name,rollno,marks) values ('Anisha',12,95)", function (err, result, fields) {
	// if any error while executing above query, throw error
    if (err) throw err;
	// if there is no error, you have the result
    console.log(result);
  });
});
Run above Node.js MySQL program in Terminal.
arjun@arjun-VPCEH26EN:~/workspace/nodejs$ node InsertIntoExample.js
OkPacket {
  fieldCount: 0,
  affectedRows: 1,
  insertId: 0,
  serverStatus: 2,
  warningCount: 0,
  message: '',
  protocol41: true,
  changedRows: 0 }
A safer insert query uses placeholders for values.
const student = ['Anisha', 12, 95];

con.query(
  'INSERT INTO students (name, rollno, marks) VALUES (?, ?, ?)',
  student,
  function (err, result) {
    if (err) throw err;
    console.log('Rows inserted:', result.affectedRows);
  }
);
Node.js Example – UPDATE Table Entries
This example updates records in the students table where the current marks value is 74.
// include mysql module
var mysql = require('mysql');

// create a connection variable with the required details
var con = mysql.createConnection({
  host: "localhost",	// ip address of server running mysql
  user: "arjun",	// user name to your mysql database
  password: "password",	// corresponding password
  database: "studentsDB" // use the specified database
});

// make to connection to the database.
con.connect(function(err) {
  if (err) throw err;
  // if connection is successful
  con.query("UPDATE students SET marks=84 WHERE marks=74", function (err, result, fields) {
	// if any error while executing above query, throw error
    if (err) throw err;
	// if there is no error, you have the result
    console.log(result);
  });
});
Run the above program in Terminal
arjun@arjun-VPCEH26EN:~/workspace/nodejs$ node UpdateRecordsFiltered.js
OkPacket {
  fieldCount: 0,
  affectedRows: 3,
  insertId: 0,
  serverStatus: 34,
  warningCount: 0,
  message: '(Rows matched: 3  Changed: 3  Warnings: 0',
  protocol41: true,
  changedRows: 3 }
Always check the WHERE clause before running an UPDATE query. Without a WHERE clause, all rows in the table may be updated.
Node.js Example – DELETE Table Entries
Execute DELETE FROM query on specified table with filter applied on one or many properties of records in the table.
// include mysql module
var mysql = require('mysql');

// create a connection variable with the required details
var con = mysql.createConnection({
  host: "localhost",	// ip address of server running mysql
  user: "arjun",	// user name to your mysql database
  password: "password",	// corresponding password
  database: "studentsDB" // use the specified database
});

// make connection to the database.
con.connect(function(err) {
  if (err) throw err;
  // if connection is successful
  con.query("DELETE FROM students WHERE rollno>10", function (err, result, fields) {
	// if any error while executing above query, throw error
    if (err) throw err;
	// if there is no error, you have the result
    console.log(result);
  });
});
arjun@arjun-VPCEH26EN:~/workspace/nodejs$ node deleteRecordsFiltered.js
OkPacket {
fieldCount: 0,
affectedRows: 6,
insertId: 0,
serverStatus: 34,
warningCount: 0,
message: '',
protocol41: true,
changedRows: 0 }Like UPDATE, DELETE should be used with care. Confirm the filter condition first by running a SELECT query with the same WHERE clause.
SELECT * FROM students WHERE rollno > 10;
DELETE FROM students WHERE rollno > 10;
Node.js Example – Using Result Object
We can access the records in Result Set as an array and properties of a record using DOT (.) Operator.
// Node.js MySQL Result Object Example
// include mysql module
var mysql = require('mysql');

// create a connection variable with the required details
var con = mysql.createConnection({
  host: "localhost",    // ip address of server running mysql
  user: "arjun",    // user name to your mysql database
  password: "password",    // corresponding password
  database: "studentsDB" // use the specified database
});

// make to connection to the database.
con.connect(function(err) {
  if (err) throw err;
  // if connection is successful
  con.query("SELECT * FROM students", function (err, result, fields) {
    // if any error while executing above query, throw error
    if (err) throw err;
    // if there is no error, you have the result
    // iterate for all the rows in result
    Object.keys(result).forEach(function(key) {
      var row = result[key];
      console.log(row.name)
    });
  });
});
Run the above program using node in Terminal
arjun@arjun-VPCEH26EN:~/workspace/nodejs$ node selectUseResultObject.js
John
Arjun
Prasanth
Adarsh
Raja
Sai
Ross
Monica
Lee
Bruce
Sukumar
Since the result is array-like, a direct forEach() loop is often easier to read.
result.forEach(function (row) {
  console.log(row.name);
});
Node.js Example – Parse URL Parameters
This example uses the built-in url module to read the host, path, search string, and query parameters from a URL.
// include url module
var url = require('url');
var address = 'http://localhost:8080/index.php?type=page&action=update&id=5221';
var q = url.parse(address, true);

console.log(q.host); //returns 'localhost:8080'
console.log(q.pathname); //returns '/index.php'
console.log(q.search); //returns '?type=page&action=update&id=5221'

var qdata = q.query; // returns an object: { type: page, action: 'update',id='5221' }
console.log(qdata.type); //returns 'page'
console.log(qdata.action); //returns 'update'
console.log(qdata.id); //returns '5221'
$ node urlParsingExample.js
localhost:8080
/index.php
?type=page&action=update&id=5221
page
update
5221
In modern JavaScript, you can also use the built-in URL class. It is a clean option when you only need to read search parameters.
const address = 'http://localhost:8080/index.php?type=page&action=update&id=5221';
const parsedUrl = new URL(address);

console.log(parsedUrl.host);
console.log(parsedUrl.pathname);
console.log(parsedUrl.searchParams.get('type'));
console.log(parsedUrl.searchParams.get('action'));
console.log(parsedUrl.searchParams.get('id'));
Node.js Example – Parse JSON File
Following example helps you to use JSON.parse() function and access the elements from JSON Object.
// json data
var jsonData = '{"persons":[{"name":"John","city":"New York"},{"name":"Phil","city":"Ohio"}]}';

// parse json
var jsonParsed = JSON.parse(jsonData);

// access elements
console.log(jsonParsed.persons[0].name);
arjun@arjun-VPCEH26EN:~/workspace/nodejs$ node nodejs-parse-json.js
JohnJSON.parse() expects a valid JSON string. Use try...catch when the JSON comes from a file, request body, or external source.
const jsonData = '{"name":"John","city":"New York"}';

try {
  const user = JSON.parse(jsonData);
  console.log(user.name);
} catch (err) {
  console.log('Invalid JSON:', err.message);
}
Node.js Example – Create HTTP Web Server
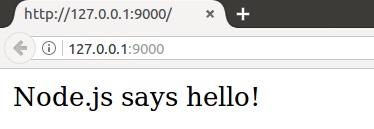
Node.js Example – A HTTP Web Server that prepares a response with HTTP header and a message.
// include http module in the file
var http = require('http');

// create a server
http.createServer(function (req, res) {
	// http header
	// 200 - is the OK message
	// to respond with html content, 'Content-Type' should be 'text/html'
	res.writeHead(200, {'Content-Type': 'text/html'});
	res.write('Node.js says hello!'); //write a response to the client
	res.end(); //end the response
}).listen(9000); //the server object listens on port 9000
Run the Server
$ node httpWebServer.jsOpen a browser and hit the url, “http://127.0.0.1:9000/”, to trigger a request to our Web Server.
The server keeps running until you stop it. In most terminals, press Ctrl + C to stop the Node.js process.
Node.js HTTP server example with request method and URL path
The previous server returns the same response for every request. The next example checks the request URL and sends different responses for the home page and an API-style route.
const http = require('http');

const server = http.createServer(function (req, res) {
  if (req.url === '/' && req.method === 'GET') {
    res.writeHead(200, { 'Content-Type': 'text/plain' });
    res.end('Home page');
    return;
  }

  if (req.url === '/api/status' && req.method === 'GET') {
    res.writeHead(200, { 'Content-Type': 'application/json' });
    res.end(JSON.stringify({ status: 'ok' }));
    return;
  }

  res.writeHead(404, { 'Content-Type': 'text/plain' });
  res.end('Page not found');
});

server.listen(9000, function () {
  console.log('Server running at http://127.0.0.1:9000/');
});
Server running at http://127.0.0.1:9000/Common Node.js beginner mistakes in these examples
- Running the wrong file: Use
node filename.jsfrom the folder where the file exists. - Missing module path: Use
./calculatorfor a local file, not justcalculator. - Forgetting npm install: Built-in modules such as
fsandhttpdo not need installation, but packages such asmysqldo. - Hard-coding secrets: Avoid keeping real database passwords in tutorial files or public repositories.
- Ignoring async callbacks: Code after an asynchronous function may run before the callback finishes.
Node.js examples FAQ
What is a module in Node.js with an example?
A module in Node.js is a separate file or package that contains reusable code. For example, a calculator.js file can export add() and subtract() functions, and another file can import them using require('./calculator').
Do I need npm for all Node.js examples?
No. Built-in modules such as fs, http, and url are available with Node.js. You need npm when you install external packages such as mysql.
Can I learn Node.js basics in a few days?
You can learn the basic commands, modules, file handling, JSON parsing, and simple server examples in a few days if you already know JavaScript. Building production-ready backend applications takes more practice because you also need routing, databases, security, testing, deployment, and error handling.
Which JavaScript data types are commonly used in Node.js examples?
Common JavaScript data types used in Node.js examples include string, number, boolean, object, array, null, undefined, bigint, and symbol. For everyday backend examples, strings, numbers, booleans, arrays, and objects are used most often.
Why does my Node.js program exit immediately?
A Node.js program exits when there is no pending work left in the event loop. A console program may finish immediately after printing output, while an HTTP server keeps running because it is listening for incoming requests.
Editorial QA checklist for Node.js examples
- Check that every file name mentioned in the text matches the command used to run it.
- Verify whether a module is built in or requires
npm install. - Confirm that SQL examples use a test database and do not encourage running destructive queries on production data.
- Use
language-javascriptfor JavaScript examples,language-bashfor terminal commands,language-sqlfor SQL snippets, andoutputfor output-only blocks. - Keep examples small enough for beginners to copy into a single file and run from the terminal.