Node.js Upload File To Server
We can let user upload a file to Node.js server from html file via browser.
Node.js Upload File – In this tutorial, we shall learn to Upload a File to Node.js Server from a web client.
A file upload in Node.js usually has three parts: an HTML form with multipart/form-data, a Node.js route that receives the request, and server-side code that stores the uploaded file in a safe location. This example uses the built-in http and fs modules with the formidable package to parse the uploaded file.
How Node.js File Upload Works with an HTML Form
When a user selects a file in the browser and submits the form, the browser sends the file as multipart form data. Node.js receives the request, formidable reads the file from the request body, and fs.rename() moves the uploaded file from its temporary location to the final upload folder.
- The browser displays a file input field.
- The form submits the selected file to the Node.js server.
- The server parses the multipart request.
- The uploaded file is moved to the target folder on the server.
- The server sends a response back to the browser.
Steps to Let User Upload File to Server in Node.js
To Upload File To Node.js Server, following is a step by step guide :
1. Prerequisite modules for Node.js file upload
We shall use http, fs and formidable modules for this example.
- http : for server acitivities.
- node fs : to save the uploaded file to a location at server.
- formidable : to parse html form data.
http and fs are core Node.js modules, so they are available with Node.js. The formidable package must be installed in your project before running the example.
If above mentioned modules are not installed already, you may install now using NPM. Run the following commands, in Terminal, to install the respective modules.
npm install http
npm install fs
npm install formidable
In a normal Node.js project, you only need to install formidable. The following command is enough for the file upload parser used in this tutorial.
npm install formidable2. Prepare a HTML Form for Node.js file upload
Prepare a HTML page (upload_file.html) with the following form, which includes input tags for file upload and form submission.
<form action="fileupload" method="post" enctype="multipart/form-data">
	<input type="file" name="filetoupload">
	<input type="submit" value="Upload">
</form>
The enctype="multipart/form-data" attribute is required for file uploads. Without it, the browser will not send the selected file in the correct multipart format.
3. Create a Node.js HTTP Server to receive the file
Create a HTTP Server that listens at port 8086 (you may change the port) and servers two urls as shown below.
http.createServer(function (req, res) {
	if (req.url == '/uploadform') {
		// if request URL contains '/uploadform'
		// fill the response with the HTML file containing upload form
	} else if (req.url == '/fileupload') {
		// if request URL contains '/fileupload'
		// using formiddable module,
		// read the form data (which includes uploaded file)
		// and save the file to a location.
	}
}).listen(8086);
The /uploadform URL sends the HTML form to the browser. The /fileupload URL receives the submitted file and handles the upload.
4. Save the uploaded file on the Node.js server
Using formidable module, parse the form elements and save the file to a location. Once file is uploaded, you may respond with a message, saying file upload is successful.
Initially, files are saved to a temporary location. We may use fs.rename() method, with the new path, to move the file to a desired location.
var form = new formidable.IncomingForm();
form.parse(req, function (err, fields, files) {
// oldpath : temporary folder to which file is saved to
var oldpath = files.filetoupload.path;
var newpath = upload_path + files.filetoupload.name;
// copy the file to a new location
fs.rename(oldpath, newpath, function (err) {
if (err) throw err;
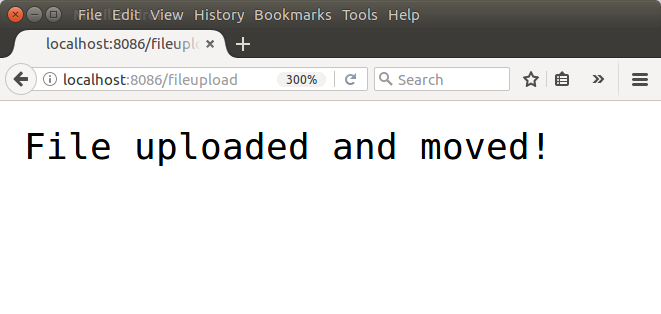
// you may respond with another html page
res.write('File uploaded and moved!');
res.end();
});
});For learning purposes, this example saves the file using the original uploaded file name. In a production application, avoid trusting the original file name directly. Validate the file type, limit the file size, and generate a safe server-side file name before storing the upload.
Example 1 – Node.js Upload File
Following is a complete working Example for Node.js Upload File
This example has two files as shown below.
arjun@tutorialkart:~/workspace/nodejs/upload_file$ ls
nodejs-upload-file.js  upload_file.html
upload_file.html
<!DOCTYPE html>
<html>
<head>
<title>Upload File</title>
<style>
	body{text-align:center;}
	form{display:block;border:1px solid black;padding:20px;}
</style>
</head>
<body>
	<h1>Upload files to Node.js Server</h1>

	<form action="fileupload" method="post" enctype="multipart/form-data">
		<input type="file" name="filetoupload">
		<input type="submit" value="Upload">
	</form>
</body>
</html
nodejs-upload-file.js
var http = require('http');
var fs = require('fs');
var formidable = require('formidable');

// html file containing upload form
var upload_html = fs.readFileSync("upload_file.html");

// replace this with the location to save uploaded files
var upload_path = "/home/arjun/workspace/nodejs/upload_file/";

http.createServer(function (req, res) {
	if (req.url == '/uploadform') {
	  res.writeHead(200);
	  res.write(upload_html);
	  return res.end();
	} else if (req.url == '/fileupload') {
		var form = new formidable.IncomingForm();
		form.parse(req, function (err, fields, files) {
			// oldpath : temporary folder to which file is saved to
			var oldpath = files.filetoupload.path;
			var newpath = upload_path + files.filetoupload.name;
			// copy the file to a new location
			fs.rename(oldpath, newpath, function (err) {
				if (err) throw err;
				// you may respond with another html page
				res.write('File uploaded and moved!');
				res.end();
			});
		});
	}
}).listen(8086);
Open a terminal or command prompt and run this script using node command as shown in the following.
Output
arjun@tutorialkart:~/workspace/nodejs/upload_file$ node nodejs-upload-file.js The files uploaded are saved next to the node.js file, nodejs-upload-file.js. You may change this location in the node.js script file.
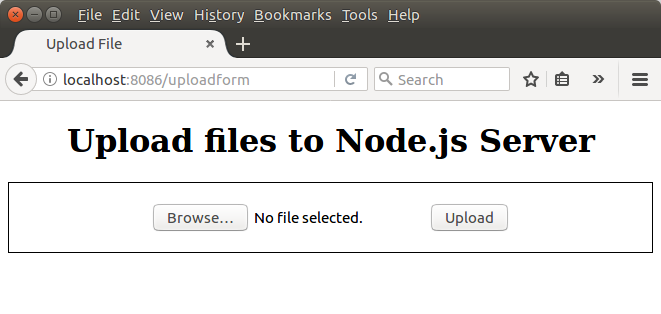
Open a Web browser (HTTP Client) and hit the url http://localhost:8086/uploadform
Click on browse.
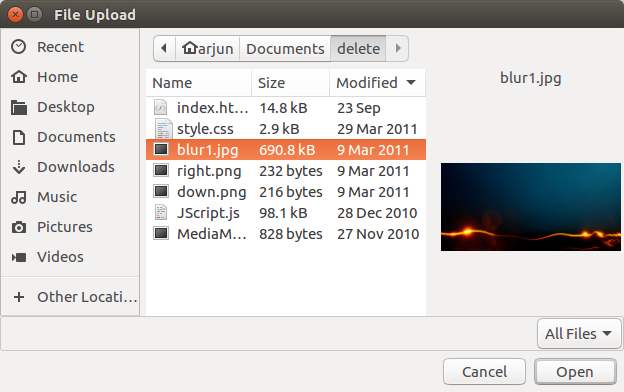
Select a file and click on Open.
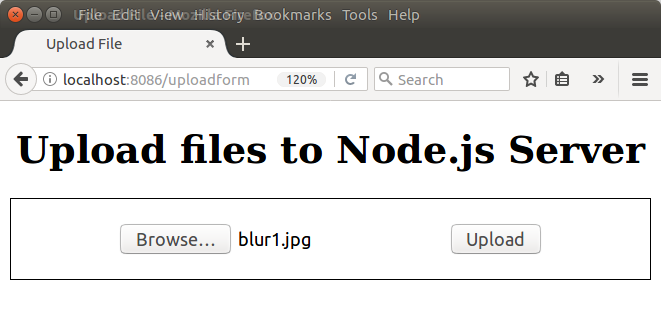
Currently, the file is uploaded to the form. Click on the Upload button for the Node.js to parse the form elements and save the file.
Check the Node.js Server, next to the node.js script file.
arjun@tutorialkart:~/workspace/nodejs/upload_file$ ls
blur1.jpg  nodejs-upload-file.js  upload_file.html
Important Checks Before Using Node.js File Upload in a Project
The basic example above explains how file upload works. Before using the same logic in an application, add a few server-side checks. Client-side checks in HTML can improve the user experience, but the server must still validate every upload.
- Upload folder: Make sure the destination folder exists and the Node.js process has permission to write files there.
- File size: Set a maximum allowed file size so that very large uploads do not consume server disk space.
- File type: Allow only the file types your application actually needs.
- File name: Do not rely on the original file name for storage. Use a safe generated name to avoid overwriting existing files.
- Error handling: Send a proper response when parsing or moving the uploaded file fails.
Allow Only Selected File Types in the HTML Upload Form
You may use the accept attribute to guide the user to choose only specific file types. This does not replace server-side validation, but it makes the file picker easier to use.
<input type="file" name="filetoupload" accept="image/png,image/jpeg">For example, the field above suggests PNG and JPEG image files in the browser file picker. The Node.js server should still check the uploaded file before saving it permanently.
Create the Upload Folder Before Moving Files in Node.js
If the upload folder does not exist, fs.rename() will fail. You can create the folder from the terminal before running the server.
mkdir uploadsYou can also create the folder from Node.js before saving files.
if (!fs.existsSync(upload_path)) {
    fs.mkdirSync(upload_path, { recursive: true });
}
Common Errors in Node.js File Upload
The following issues are common when running a file upload example for the first time.
- The form submits, but no file is received: Check that the form has
method="post"andenctype="multipart/form-data". - The server cannot move the file: Check the upload path and folder permissions.
- The uploaded file is saved with an unexpected name: Check the file object returned by the upload parser and confirm which property contains the original name.
- The browser keeps loading: Make sure every code path ends the response with
res.end(). - The file overwrites another file: Generate a unique server-side file name before saving.
Node.js File Upload FAQ
Which HTML form encoding is required for Node.js file upload?
Use enctype="multipart/form-data" in the HTML form. This encoding allows the browser to send the selected file as part of the form request.
Can Node.js upload files without Express?
Yes. The example in this tutorial uses the built-in http module and does not require Express. Express is commonly used in larger applications, but it is not required to understand the basic file upload flow.
Why is formidable used in this Node.js upload example?
The browser sends file uploads as multipart form data. formidable parses that multipart request and gives access to the uploaded file details, including the temporary path where the file was stored.
Where are uploaded files stored in this Node.js example?
The uploaded file is first stored in a temporary location by the upload parser. Then fs.rename() moves it to the location assigned to the upload_path variable in the Node.js script.
Should the original uploaded file name be used on the server?
For a simple local tutorial, using the original name is easy to understand. For a real application, generate a safe unique file name on the server and validate the upload before saving it.
QA Checklist for This Node.js Upload File Tutorial
- Confirm that the HTML form uses
method="post"andenctype="multipart/form-data". - Confirm that the file input name matches
files.filetouploadin the Node.js code. - Confirm that the upload folder path exists or is created before moving the file.
- Confirm that the server response ends after upload success or failure.
- Confirm that production notes mention file size, file type, and file name validation.
Conclusion
In this Node.js Tutorial – Node.js Upload File to Server, we have learnt to use formidable, fs and http modules for uploading a file to Node.js Server.
The same upload flow can be extended with validations, upload folders, unique file names, and better error handling when you build a real Node.js file upload feature.