This Basic JavaFX Example Application tutorial shows how to create a simple JavaFX window, place a text message in the scene, and run the program. The example is intentionally small so that you can understand the main JavaFX application structure before adding buttons, layouts, CSS, images, or event handling.
JavaFX applications usually start from a class that extends Application. The JavaFX runtime calls the start(Stage primaryStage) method, where you create the scene graph and show the main window. If you are using modern Java versions where JavaFX is not bundled with the JDK, install and configure OpenJFX first. The official OpenJFX documentation and Oracle’s JavaFX Hello World guide are useful references for setup details.
Basic JavaFX Example Application
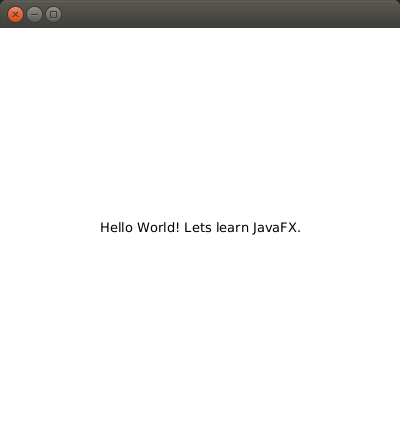
Following is a step by step guide to build Basic JavaFX Example Application. The final output is a JavaFX application window that displays the message Hello World! Lets learn JavaFX. in the center.
JavaFX Example Prerequisites Before Creating the Project
Before you create the project, make sure the following requirements are available on your system.
- JDK is installed and configured in the IDE.
- JavaFX support is available in the IDE, or OpenJFX libraries are configured manually.
- You have a source folder where the Java class can be created.
- If you are using Java 11 or later, JavaFX modules may need to be added separately because JavaFX is distributed outside the JDK.
The project steps below follow the JavaFX project flow used in Eclipse-style IDEs. In IntelliJ IDEA, NetBeans, VS Code, or a Maven/Gradle project, the screen names may be different, but the JavaFX class structure remains the same.
1. Create a New JavaFX Project in the IDE
Follow the clicks : Main Menu -> File -> New -> Project -> JavaFX -> JavaFX Project.
Provide the ‘Project Name‘ – JavaFXExamples and click on Finish.
JavaFXExamples project of type JavaFX would be created.
A basic JavaFX project usually contains a source folder, a main Java class, and optionally a CSS file. In older JavaFX project templates, you may also see an application.css file created automatically.
2. Understand the Main JavaFX Application Class
By default, Main.java would be created in /src/application/ with necessary code to start the application with an empty window.
Main.java
import javafx.application.Application;
import javafx.stage.Stage;
import javafx.scene.Scene;
import javafx.scene.layout.BorderPane;

public class Main extends Application {
	@Override
	public void start(Stage primaryStage) {
		try {
			BorderPane root = new BorderPane();
			Scene scene = new Scene(root,400,400);
			scene.getStylesheets().add(getClass().getResource("application.css").toExternalForm());
			primaryStage.setScene(scene);
			primaryStage.show();
		} catch(Exception e) {
			e.printStackTrace();
		}
	}

	public static void main(String[] args) {
		launch(args);
	}
}
The important parts of this JavaFX example are:
Applicationis the base class for JavaFX applications.start(Stage primaryStage)is called after the JavaFX runtime starts.Stagerepresents the main application window.Sceneholds the visual content shown inside the window.BorderPaneis a layout container used as the root node in this starter code.launch(args)starts the JavaFX application lifecycle.
If the project does not contain application.css, the stylesheet line may throw an exception. In that case, either create the CSS file in the expected package or remove the stylesheet line until you need custom styling.
3. Add a Text Message to the JavaFX Scene
We shall replace BorderPane with StackPane and add a Text shape to the StackPane. The complete JavaFX Class program is as shown in the following program.
Main.java
import javafx.application.Application;
import javafx.stage.Stage;
import javafx.scene.Scene;
import javafx.scene.layout.StackPane;
import javafx.scene.text.Text;

public class Main extends Application {
	@Override
	public void start(Stage primaryStage) {
		try {
			// create a new Text shape
			Text messageText = new Text("Hello World! Lets learn JavaFX.");

			// stack page
			StackPane root = new StackPane();

			// add Text shape to Stack Pane
			root.getChildren().add(messageText);

			Scene scene = new Scene(root,400,400);
			scene.getStylesheets().add(getClass().getResource("application.css").toExternalForm());
			primaryStage.setScene(scene);
			primaryStage.show();
		} catch(Exception e) {
			e.printStackTrace();
		}
	}

	public static void main(String[] args) {
		launch(args);
	}
}
In this version, StackPane is used because it places its child nodes in a stack and centers them by default. Since this example has only one Text node, the text appears in the center of the application window.
How the Basic JavaFX Example Works Internally
The program follows the standard JavaFX flow:
- The
main()method callslaunch(args). - The JavaFX runtime creates an instance of the application class.
- The runtime calls the
start()method and passes the primaryStage. - The program creates a
Textnode. - The
Textnode is added to aStackPane. - The
StackPaneis placed inside aScene. - The scene is attached to the stage.
primaryStage.show()displays the window.
This structure is the base for most JavaFX applications. As your application grows, you add more nodes to the scene graph, use suitable layout panes, attach event handlers, and apply CSS styles.
4. Run the Basic JavaFX Application
Follow the clicks Main Menu -> Run -> Run.
When the program runs correctly, a JavaFX window with width 400 and height 400 opens. The message text appears inside the window.
Optional JavaFX Module File for Java 11 and Later
If you create a modular JavaFX project in Java 11 or later, you may need a module-info.java file. The exact module name depends on your project. For this example, a simple module file can look like this:
module JavaFXExamples {
    requires javafx.controls;

    exports application;
}
The requires javafx.controls; line is needed because common JavaFX UI classes such as Application, Stage, Scene, and layout controls are provided through JavaFX modules. The exports application; line exports the package that contains the main class. If your package name is different, update the exported package name accordingly.
Common JavaFX Example Errors and Fixes
| Problem | Likely Cause | Fix |
|---|---|---|
| Application window does not open | JavaFX runtime is not configured | Install/configure OpenJFX and add the required VM options or build tool settings. |
NullPointerException near application.css | The CSS file is missing or not in the expected package | Create application.css in the correct location or remove the stylesheet line. |
ClassNotFoundException or module error | JavaFX modules are not on the module path | Add JavaFX SDK libraries and required modules such as javafx.controls. |
| Text is not visible | The node is not added to the root layout or scene is not set | Check that root.getChildren().add(messageText) and primaryStage.setScene(scene) are present. |
| Program compiles but closes immediately | The JavaFX lifecycle was not started properly | Make sure main() calls launch(args). |
Small Improvements You Can Try in This JavaFX Program
After the basic JavaFX example runs, you can make small changes to understand the scene graph better.
- Change the window size in
new Scene(root,400,400). - Change the displayed text in the
Textconstructor. - Add
primaryStage.setTitle("My First JavaFX App")beforeprimaryStage.show(). - Replace
StackPanewith another layout pane, such asBorderPaneorVBox, and observe the layout difference. - Add CSS only after the application runs without styling errors.
Basic JavaFX Example QA Checklist
Use this checklist when reviewing the JavaFX example application:
- The class extends
javafx.application.Application. - The
start(Stage primaryStage)method is implemented. - A root layout such as
StackPaneis created. - The
Textnode is added to the root layout. - A
Sceneis created with the root layout. - The scene is set on the primary stage.
- The primary stage is shown using
primaryStage.show(). - The CSS file reference is valid, or the stylesheet line is removed.
- For Java 11 or later, JavaFX SDK/module configuration is complete.
FAQs on Basic JavaFX Example Application
What is the purpose of the start() method in a JavaFX application?
The start() method is the main entry point for JavaFX UI code. After the JavaFX runtime starts, it calls start(Stage primaryStage). You normally create the scene graph, set the scene on the stage, and show the stage inside this method.
What is the difference between Stage and Scene in this JavaFX example?
Stage represents the application window. Scene represents the content placed inside that window. In this example, the Scene contains a StackPane, and the StackPane contains the Text node.
Why is StackPane used in the Basic JavaFX Example Application?
StackPane is used because it is simple and centers its child nodes by default. For a first JavaFX example with one text message, it keeps the layout easy to understand.
Can I run this JavaFX example on Java 11 or later?
Yes, but JavaFX must be configured separately when it is not included with the JDK. You can use the OpenJFX SDK, Maven, or Gradle setup and include the required modules such as javafx.controls.
Why does application.css cause an error in a JavaFX project?
The stylesheet line expects application.css to be available as a resource in the correct package. If the file is missing, getResource("application.css") returns null. Create the CSS file in the expected location or remove the stylesheet line until styling is needed.
What You Learned in This Basic JavaFX Example Application
In this JavaFX Tutorial – Basic JavaFX Example Application, we have learnt to create a JavaFX application, display a Text Shape, and run the application. You also saw how Application, Stage, Scene, StackPane, and Text work together in a small JavaFX program.