After creating a Lead, the next useful step is to record the lead source in Dynamics 365 Sales. The lead source tells your sales team where the lead came from, such as a website form, advertisement, referral, webinar, trade show, phone enquiry, email campaign, or partner campaign.
The Lead Source field is useful because it gives sales and marketing teams a consistent way to compare which channels are creating leads. When the values are maintained carefully, you can filter leads, build views, create dashboards, and review which campaigns or events are producing better follow-up conversations.
How to add new lead Source in Dynamics 365?
There are two common tasks related to lead source in Dynamics 365. The first is selecting a lead source value on an individual lead record. The second is customizing the Lead Source choice list so that users can select values that match your business process.
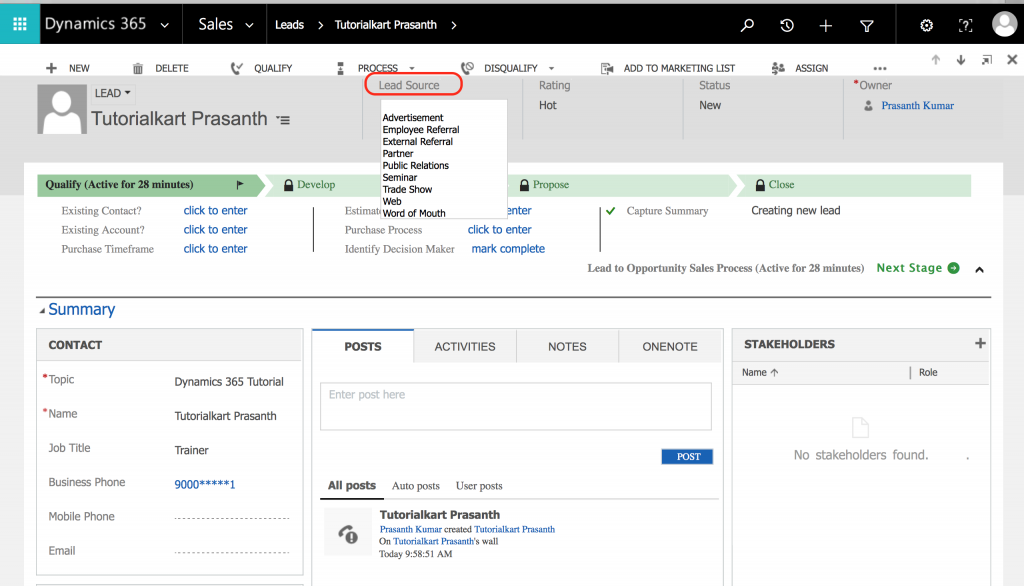
The Header section of the lead form enables you to set the Lead owner, by default the lead owner will be the user who created the record, as well as the status reason, lead source, and rating. The bottom left of the form shows the status reason. When you’re working with unqualified or new leads, the status reason enables you to select whether the lead is new or contacted. When a lead is converted, the status reason changes to Qualified if the lead was converted to a customer, or it changes to the reason it was disqualified (as selected during the conversion process).
Selecting Lead Source on a Dynamics 365 lead record
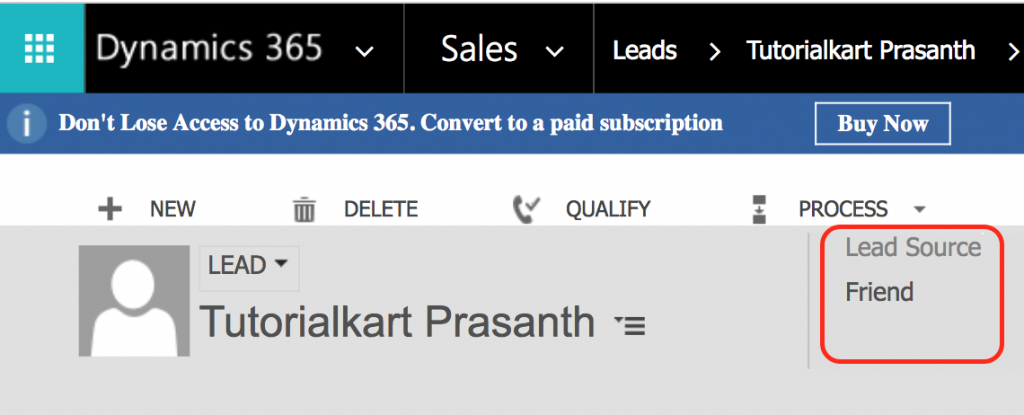
To add lead source navigate to Dynamics 365 | Sales | Lead | lead name | Lead source.
- Click on Lead Source and select source from the drop down.
In the modern Sales Hub app, the same task is usually performed from Sales Hub > Leads. Open the lead record, find the Lead Source field on the form, choose the correct value, and save the record. The exact form section can vary if your administrator has customized the lead form.
If the Lead Source field is not visible on the form, it does not always mean that the field is missing from Dynamics 365. It may have been removed from the form, hidden by a business rule, or placed on another tab. A system customizer can add the field back to the lead form if users need to update it directly.
Good examples of Dynamics 365 Lead Source values
Lead source values should be broad enough for reporting, but not so broad that they become unclear. For example, “Website” is usually better than mixing many slightly different values such as “Web”, “Website Form”, “Site Contact Page”, and “Online Form” unless your reporting model requires that level of detail.
| Lead source value | When to use it | Reporting note |
|---|---|---|
| Website | A prospect submitted a web form or contacted the business through the website. | Use campaign fields or tracking parameters for more detailed web attribution. |
| Advertisement | The lead came from a paid ad, sponsored listing, print ad, or display campaign. | Keep ad platform details in campaign records if you need deeper analysis. |
| Referral | An existing customer, partner, employee, or contact referred the prospect. | Consider storing the referring person or account in a separate field. |
| Trade Show | The prospect was collected during an event, booth visit, seminar, or exhibition. | Use a campaign record for the specific event name. |
| Phone Inquiry | The prospect contacted the sales team by phone before becoming a qualified opportunity. | Useful for separating inbound enquiries from marketing-generated leads. |
You can easily add to this drop-down list by customizing the lead source code attribute, adding specific events that your company might sponsor or attend.
Customizing Lead source option in Microsoft Dynamics 365
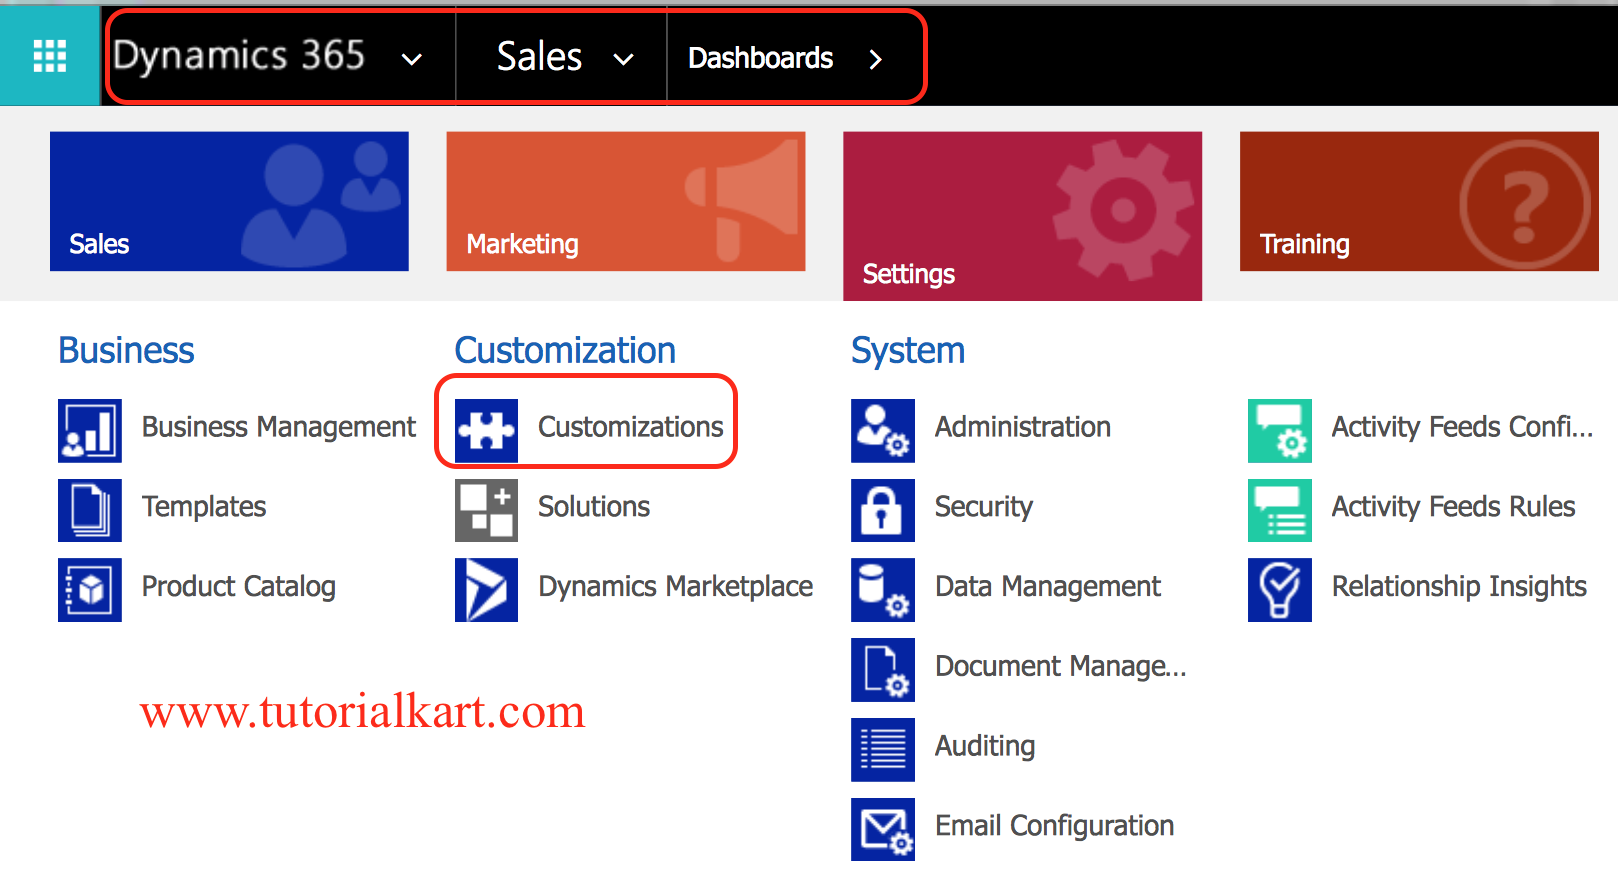
To customize lead source option in Microsoft Dynamics 365, navigate to Settings | Customisations | Customize the system | Customize lead Entity.
- Click on Customizations as shown below.
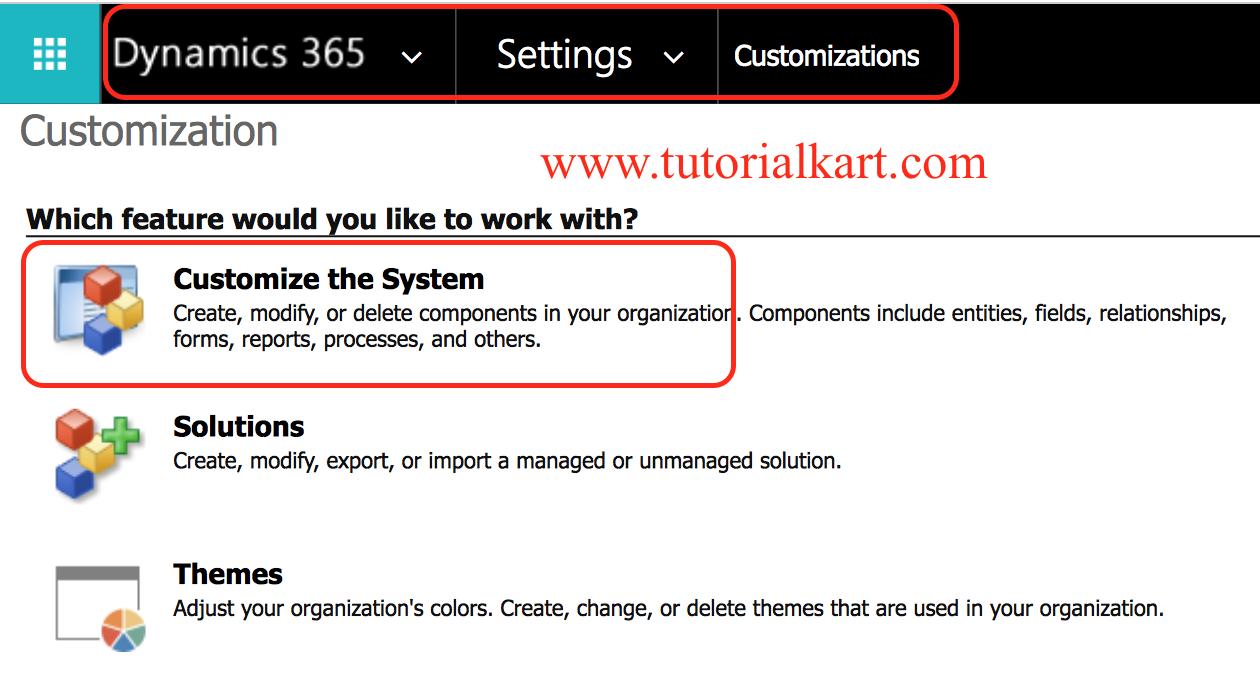
- Now click on Customize the system.
- Now on the left sidebar navigate to Lead | Fields | Field Source.
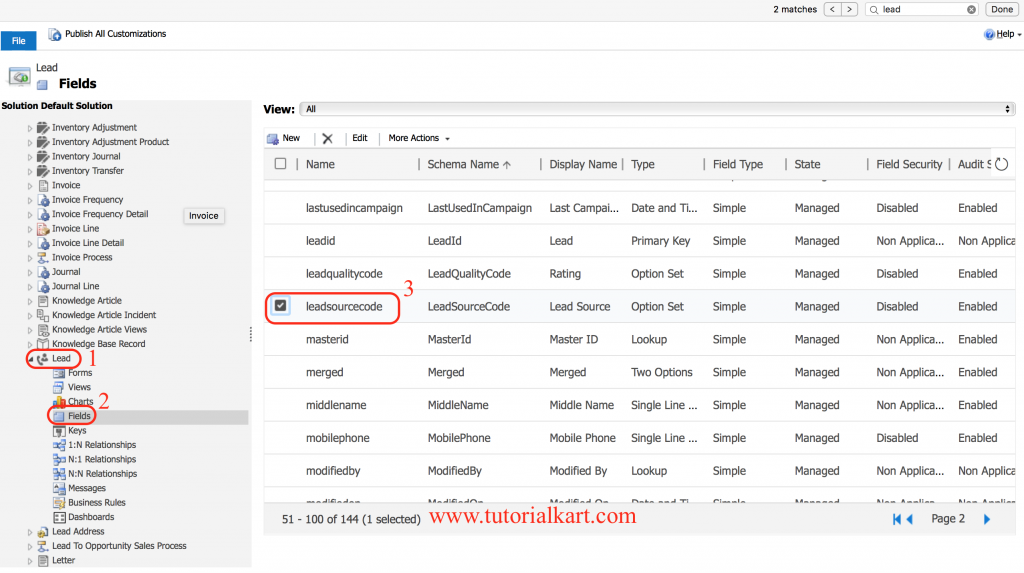
- Click on Edit button to create new Lead Source.
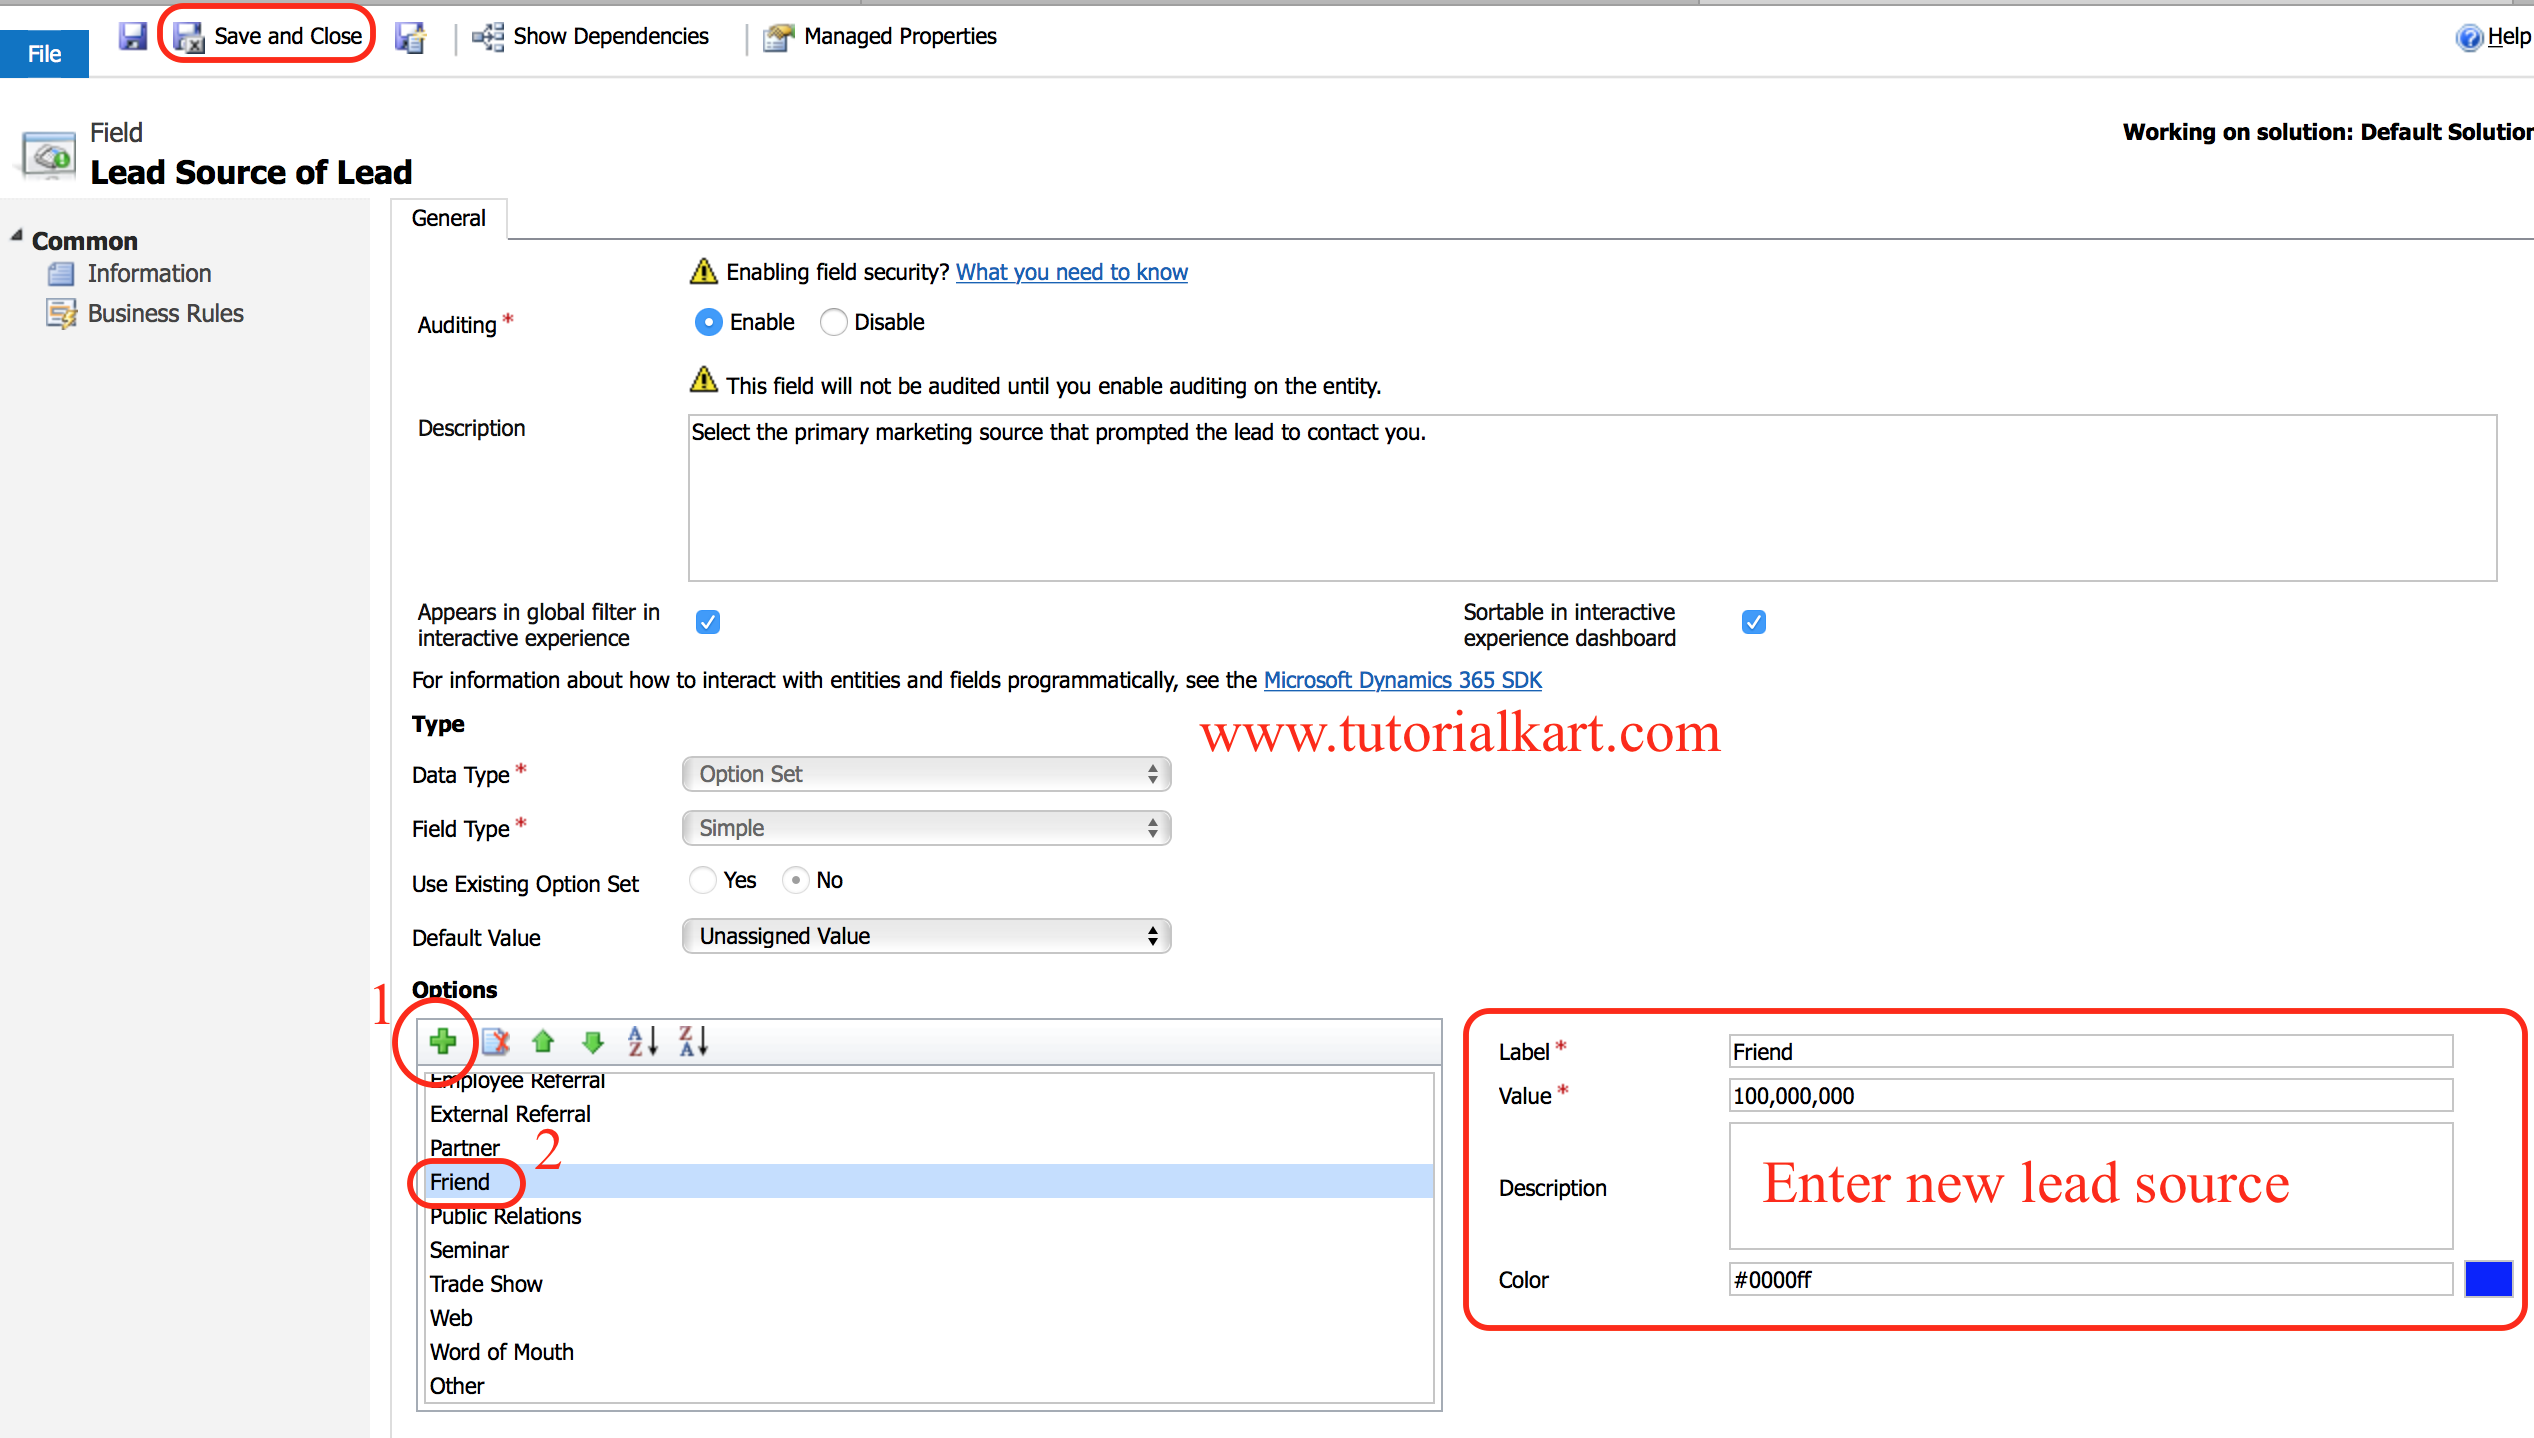
- Go to options section and click on + button to create new custom Lead source.
- After click item will be added in the list and click on the item and rename Label as desired.
- Now click on Save button.
In newer Microsoft Power Platform environments, many administrators prefer to make this type of change from a solution in the maker portal. The equivalent approach is to open the solution that contains your sales customizations, go to the Lead table, open Columns, find Lead Source, and update the available choices. After saving and publishing, test the change in the Sales Hub lead form.
Recommended steps before changing the Lead Source choice list
- Review existing lead source data: Check whether similar values already exist before adding another value.
- Use clear labels: Choose labels that sales users can understand without asking the administrator.
- Avoid temporary event names as source values: For a specific event, use a campaign record where possible and keep the source value more general, such as Trade Show or Webinar.
- Check reports and views: Updating choices can affect filters, dashboards, charts, and integrations that depend on lead source values.
- Publish and test: After customizing the field, publish customizations and create or edit a test lead to confirm that the value appears correctly.
Lead Source and Opportunity Source in Dynamics 365
Lead Source and Opportunity Source are related, but they are not always the same field in reporting. Lead Source describes how the original lead entered Dynamics 365. Opportunity source, when used by an organization, usually describes where the sales opportunity came from or how the opportunity was created.
For example, a person may first enter the system as a lead from a webinar. After qualification, the sales team may create an opportunity from that lead. In reporting, the business may want to preserve the original lead source as “Webinar” while also tracking the opportunity’s campaign, product interest, owner, or sales process stage.
Before changing lead source values, decide how your organization wants attribution to work from lead creation through qualification. This helps avoid inconsistent reporting after leads are converted into accounts, contacts, and opportunities.
Importing leads with Lead Source in Dynamics 365
When you import leads into Dynamics 365, make sure the import file uses lead source values that already exist in the Lead Source choice list. If the file contains inconsistent values, the import may fail for those rows or create reporting problems after the data is loaded.
- Standardize lead source names in the spreadsheet before import.
- Map the spreadsheet column to the Dynamics 365 Lead Source field during import.
- Test with a small sample before importing a large lead list.
- Review duplicate detection rules so that imported leads do not create unnecessary duplicate records.
Common Lead Source mistakes in Dynamics 365 Sales
- Creating too many similar values: This makes reports harder to read and forces users to guess which option is correct.
- Using lead source for campaign names: Campaigns, events, and tracking codes are usually better stored in campaign or marketing fields.
- Not training users: If users do not understand each value, they may select the first option or leave the field blank.
- Changing values without checking integrations: Web forms, automation tools, imports, and reporting tools may depend on existing lead source labels or values.
- Ignoring old records: If you rename or replace choices, review whether historical lead records still make sense for reporting.
QA checklist for this Dynamics 365 Lead Source setup
- The Lead Source field is visible on the lead form used by sales users.
- The choice list contains only approved lead source values.
- New values have clear labels and do not duplicate existing meanings.
- Sales views, charts, dashboards, and reports still work after the change.
- Lead import templates and web-to-lead integrations send valid Lead Source values.
- Users know when to select Website, Advertisement, Referral, Trade Show, Webinar, or other values.
- A test lead can be created, saved, edited, and reported with the new lead source value.
FAQs on Lead Source in Dynamics 365
How do I create a lead in Dynamics 365 Sales?
Open the Sales Hub app, go to Leads, select New, enter the required lead details, and save the record. After the lead is created, you can update fields such as Lead Source, Rating, Owner, Topic, and contact information.
How do I add a new Lead Source value in Dynamics 365?
A system administrator or customizer can update the Lead Source choice list from customization settings or from a solution in the Power Platform maker portal. Open the Lead table, find the Lead Source column, add the new choice value, save, publish, and test it on a lead form.
Why is the Lead Source field not visible on my lead form?
The field may have been removed from the form, placed on another tab, hidden by a business rule, or excluded from the app form that your team uses. A customizer can edit the lead form and add the Lead Source field back if required.
How do I import leads with Lead Source in Dynamics 365?
Add a Lead Source column to the import file and use values that match the available choices in Dynamics 365. During import, map that column to the Lead Source field and test with a small file before importing a large list.
What is the difference between Lead Source and Opportunity Source?
Lead Source records where the original lead came from. Opportunity Source, if your organization uses it, can describe how the opportunity was created or attributed. Keep the definitions separate so that lead reports and opportunity reports do not mix different meanings.
Conclusion
In this Dynamics 365 tutorial, we have learned how to add new lead Source in Dynamics 365, how to select a lead source on a lead record, and how to customize the Lead Source options for better reporting. Keep the list simple, publish and test every change, and make sure sales users understand how each lead source value should be used.