Flutter Text Widget

The Flutter Text widget displays a string of text in a Flutter user interface. It can show a single label, a multiline message, an app-bar title, or styled text that follows the surrounding theme.

In this tutorial, you will learn how to create a basic Text widget, update its value during development, style it with TextStyle, control alignment and wrapping, and handle text that is too long for the available space.

Basic Flutter Text Widget Syntax

Pass the text to display as the first argument of the Text constructor.

</>
Copy
Text('Text to display')

The text value must be a Dart String. The widget also accepts named parameters such as style, textAlign, maxLines, overflow, and softWrap.

Example: Display Text in a Flutter App

In this example, we will create a Flutter application and use Text widgets to display a title in the application bar and a message in the body.

Create the Flutter Project

Create a Flutter application in your preferred IDE or from the command line. Open the generated project and locate lib/main.dart.

Add Text Widgets to main.dart

Replace the contents of lib/main.dart with the following code.

main.dart

</>
Copy
import 'package:flutter/material.dart';

void main() => runApp(MyApp());

class MyApp extends StatelessWidget {
  @override
  Widget build(BuildContext context) {
    return MaterialApp(
      title: 'Flutter Tutorial',
      home: Scaffold(
        appBar: AppBar(
          title: Text('Flutter Text Widget Tutorial'),
        ),
        body: Center(
          child: Text('Hello World'),
        ),
      ),
    );
  }
}

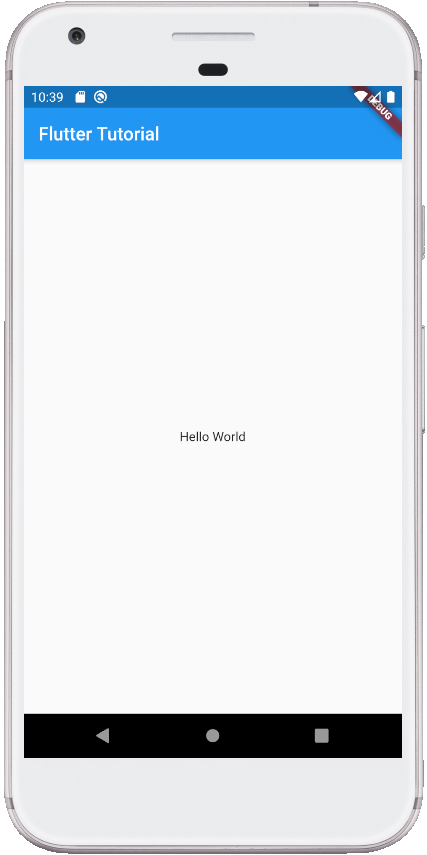
The MaterialApp provides the Material Design application structure. Inside it, Scaffold creates the page layout. One Text widget is used as the AppBar title, and another is centered in the page body.

The simplest use of the widget is Text('Hello World'). Flutter lays out the string using the text style inherited from the nearest theme or parent widget.

When you run the application, the text widgets are displayed as shown below.

Flutter Text Widget

Update the Text and Use Hot Reload

Change the string passed to the body Text widget, save the file, and use hot reload. Flutter rebuilds the affected widgets and displays the updated text without restarting the entire application.

main.dart

</>
Copy
import 'package:flutter/material.dart';

void main() => runApp(MyApp());

class MyApp extends StatelessWidget {
  @override
  Widget build(BuildContext context) {
    return MaterialApp(
      title: 'Flutter Tutorial',
      home: Scaffold(
        appBar: AppBar(
          title: Text('Flutter Text Widget Tutorial'),
        ),
        body: Center(
          child: Text('Hello World! This is a text widget.'),
        ),
      ),
    );
  }
}

Screenshot
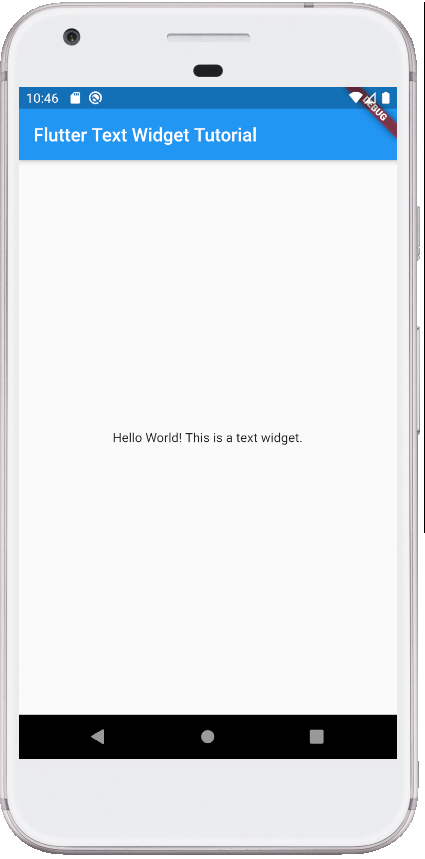
Flutter text widget example

The example code uses the constructor style available when the tutorial was originally written. In a newly generated Flutter project, you may also see const constructors and a key parameter. These additions improve compile-time optimization and follow current Dart conventions, but the purpose of the Text widget remains the same.

Style a Flutter Text Widget with TextStyle

Use the style parameter with a TextStyle object to control the appearance of text. Common properties include fontSize, fontWeight, color, fontStyle, letterSpacing, wordSpacing, and decoration.

</>
Copy
const Text(
  'Account Summary',
  style: TextStyle(
    fontSize: 24,
    fontWeight: FontWeight.bold,
    letterSpacing: 0.5,
  ),
)

For a focused example, see how to change the font size of a Flutter Text widget.

Align Multiline Text with textAlign

The textAlign parameter controls how lines are aligned inside the width assigned to the widget. It is most noticeable when the text wraps onto multiple lines or when the widget is placed inside a parent with a defined width.

</>
Copy
const SizedBox(
  width: 280,
  child: Text(
    'This message is centered within the available width.',
    textAlign: TextAlign.center,
  ),
)

Available values include TextAlign.left, TextAlign.right, TextAlign.center, TextAlign.justify, TextAlign.start, and TextAlign.end. The start and end values adapt to the current text direction.

Limit Flutter Text Lines and Handle Overflow

Long text may exceed the space available in a row, card, list tile, or other constrained layout. Use maxLines to limit the number of visible lines and overflow to define what happens to the remaining text.

</>
Copy
const Text(
  'A long product description that may not fit in the available space.',
  maxLines: 2,
  overflow: TextOverflow.ellipsis,
)

TextOverflow.ellipsis displays an ellipsis when the content is truncated. Other options are clip, fade, and visible. In a horizontal Row, wrap a flexible text child with Expanded or Flexible so that Flutter can calculate a valid width for wrapping or truncation.

Control Text Wrapping with softWrap

By default, text can wrap at suitable line breaks when the available width is limited. Set softWrap to false when the text should stay on one visual line and be handled by the selected overflow behavior.

</>
Copy
const Text(
  'This text remains on one line.',
  softWrap: false,
  overflow: TextOverflow.fade,
)

Use Theme Text Styles Instead of Repeating TextStyle

For consistent typography, start with a style from the application theme instead of creating unrelated font settings for every widget. You can use the theme style directly or modify selected properties with copyWith.

</>
Copy
Text(
  'Profile',
  style: Theme.of(context).textTheme.headlineSmall?.copyWith(
    fontWeight: FontWeight.w600,
  ),
)

This approach keeps text consistent across screens and allows typography changes to be managed through the app theme.

Display Different Styles in One Sentence

A regular Text widget applies one base style to its string. When different words need different styles, use Text.rich with nested TextSpan objects.

</>
Copy
const Text.rich(
  TextSpan(
    text: 'Status: ',
    children: [
      TextSpan(
        text: 'Active',
        style: TextStyle(fontWeight: FontWeight.bold),
      ),
    ],
  ),
)

Use this pattern for short inline emphasis. For larger sections of differently styled content, consider composing the interface from multiple widgets so layout and accessibility remain clear.

Flutter Text Widget Parameters at a Glance

ParameterPurpose
styleSets font size, weight, color, spacing, decoration, and related visual properties.
textAlignAligns lines within the width available to the text.
maxLinesLimits how many lines can be displayed.
overflowControls clipping, fading, ellipsis, or visible overflow.
softWrapDetermines whether the text may wrap at soft line breaks.
textDirectionDefines left-to-right or right-to-left direction when it cannot be inherited.
textScaleFactorLegacy scaling parameter found in older code; current Flutter APIs favor text-scaling configuration that supports nonlinear scaling.
semanticsLabelProvides an alternative label for assistive technologies when needed.

Common Flutter Text Layout Problems

  • Text overflows inside a Row: wrap the text child with Expanded or Flexible, then choose an appropriate maxLines and overflow value.
  • TextAlign appears to do nothing: give the widget enough horizontal width so the alignment can be observed.
  • Text does not follow the app design: use a style from Theme.of(context).textTheme rather than repeating hard-coded styles.
  • Text is cut off at larger accessibility sizes: test the layout with increased system text size and avoid fixed-height containers that cannot grow.
  • A const error appears: use const only when every constructor argument is a compile-time constant.

Flutter Text Widget FAQs

How do I display a variable in a Flutter Text widget?

Pass the string variable directly, or use Dart string interpolation when combining it with other text.

</>
Copy
final userName = 'Sam';

Text('Welcome, $userName')

How do I move Flutter text to the center?

Wrap the Text widget with Center to position the widget in the center of its parent. Use textAlign: TextAlign.center to center the lines inside the text widget’s available width. Some layouts require both.

Why does Flutter show a yellow and black overflow warning near text?

The text is receiving less space than it needs, commonly inside a Row. Give it a bounded flexible width with Expanded or Flexible, and configure wrapping or TextOverflow.ellipsis.

How do I make only one word bold in Flutter text?

Use Text.rich or RichText with multiple TextSpan children, then apply a bold TextStyle only to the required span.

What is the difference between Text and RichText in Flutter?

Text is the usual choice for a string with one inherited or explicitly assigned style. RichText renders a tree of TextSpan objects, which is useful when one text passage needs multiple styles. Text.rich provides a convenient way to create rich text while retaining the defaults of the Text widget.

Flutter Text Widget Editorial QA Checklist

  • Confirm every Dart example uses valid string literals and balanced widget parentheses.
  • Check that examples inside a Row provide a bounded width before demonstrating wrapping or ellipsis.
  • Verify that textAlign examples place the text in a parent wide enough to show alignment.
  • Test long strings, two-line strings, and increased system text size to detect clipping.
  • Use theme typography for reusable interface text and reserve inline TextStyle values for deliberate exceptions.

Summary

Use Text to display a Dart string in a Flutter interface. Start with Text('Hello World'), use TextStyle or theme typography for appearance, apply textAlign for line alignment, and combine maxLines with overflow when space is limited. Use Text.rich when different parts of one sentence require different styles.