Inserting a Record using Apex Data Loader
Apex Data Loader is a desktop client application used to bulk import and export Salesforce data. Using Apex Data Loader, we can insert records from a CSV (Comma Separated Value) file into Salesforce. The Insert operation is used only for creating new records. If the same file may contain existing records, use Update or Data loader UPSERT instead.
This tutorial explains how to prepare a CSV file, select the Salesforce object, map CSV columns to Salesforce fields, run the Insert operation, and verify success and error files after the load. The same process applies to standard objects and custom objects, provided your user has the required permissions.
When to use Apex Data Loader insert in Salesforce
Use Apex Data Loader Insert when you need to create new Salesforce records in bulk from a CSV file. It is commonly used when Data Import Wizard is not enough, when the target object is not supported by Data Import Wizard, or when you need more control over field mapping and result files. Salesforce also provides official guidance on when to use Data Loader.
Do not use Insert when the records already exist in Salesforce. Insert creates new records and does not update matching records. For existing records, use Update with Salesforce record IDs. For a mixed file containing new and existing records, use Upsert with a Salesforce ID or External ID.
CSV preparation before inserting Salesforce records with Data Loader
Before inserting records through Data Loader, we have to create a .CSV file and add fields in rows and columns as shown below.
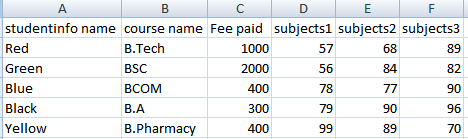
The first row in the CSV file should contain column headers. These headers can use field labels or API names, but API names are safer for custom fields because they avoid confusion between similar labels. For example, a custom field usually ends with __c, such as Course_Name__c.
Name,Course_Name__c,Fee_Paid__c,Subject1_Marks__c,Subject2_Marks__c,Subject3_Marks__c
Student-001,Salesforce Admin,5000,78,82,88
Student-002,Salesforce Developer,6000,81,76,90
For an Insert operation, do not provide Salesforce record IDs in the CSV. Salesforce generates a new record ID for every successfully inserted record. Include all required fields, valid picklist values, required lookup or master-detail parent IDs, and values needed by validation rules.
How to insert records using Apex Data Loader?
Follow these steps after installing Data Loader and preparing the CSV file. Before running the full insert, it is good practice to test with a small CSV file and confirm that Salesforce creates the expected records.
Step 1: Open Apex Data Loader and choose Insert
Step 1 :- Go to Apex data loader and Click on Insert Button.
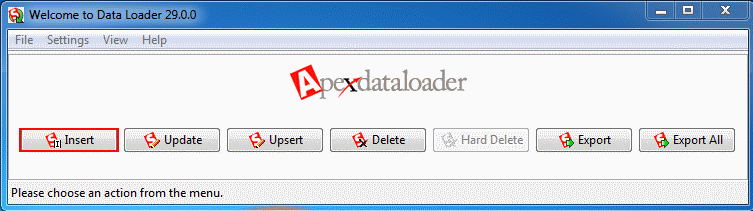
- Open Salesforce Data Loader.
- Click on Insert.
- Enter Username and Password to login to Salesforce.
- Password authentication may require a combination of password and Security token.
- Click on Login.
In current Salesforce orgs, OAuth login is usually preferred because it supports browser-based authentication and multi-factor authentication. Password authentication can still be used where allowed by the org configuration.
Step 2: Select the Salesforce object for the insert operation
Step 2:- Selecting Object.
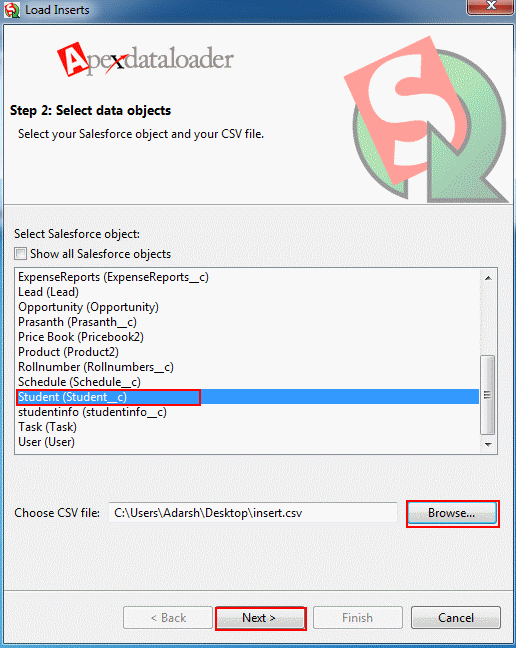
- Select the object from list.
- Now select CSV which we prepare earlie.
- Click on Next button as shown above.
If your custom object is not visible in the list, check whether the logged-in user has object permissions, API access, and field-level access. For custom objects, also verify the exact API name, for example Studentinfo__c.
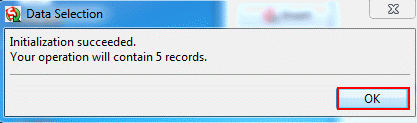
- Now a successful data selection message will be displayed.
- Click on Ok button to initialize Apex data loader insertion.
Step 3: Map CSV columns to Salesforce object fields
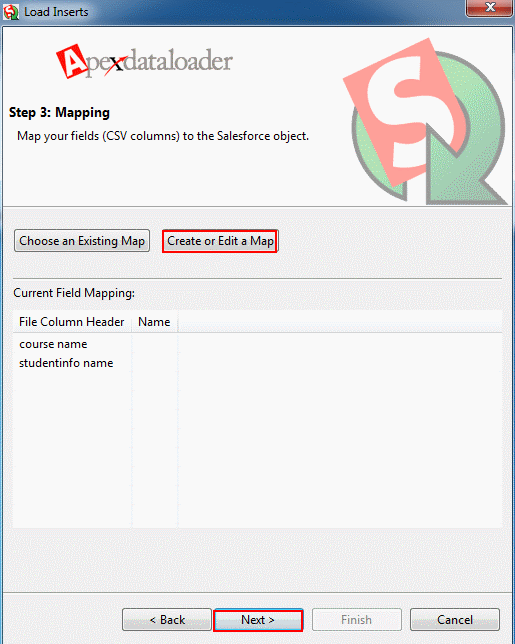
Step 3 :- Mapping (Creating or Editing a Map).
What is Mapping?
Mapping is the process of mapping CSV (Comma Separated Value) fields to the object in Salesforce account. Mapping can be done manually or automatically. Automatic mapping works best when CSV column names match Salesforce field names. Manual mapping is safer when labels are similar or when custom fields are used.
- Now select on Create or Edit a Map.
- Click on Next button.
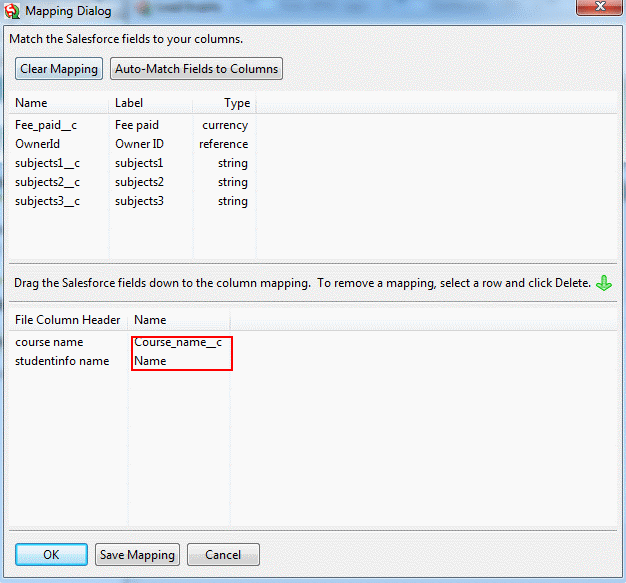
- Now drag the salesforce object field down to the column mapping.
- Map every required CSV column to the correct Salesforce field.
- Now click on Ok button.
- When we click on Save Mapping, this mapping will be saved and can be used in future.
Saved mappings are useful when you repeat the same insert process for the same object. If the CSV column names change later, open the saved map and verify each mapping before running another load.

- Click on Finish button.
Step 4: Confirm the Salesforce Data Loader insert job
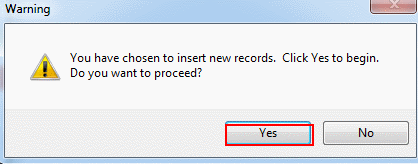
- A warning message will be displayed as shown above.
- Review the selected object, CSV file, and operation before continuing.
- Click on Yes button to insert records using apex data loader.
Insert is a data-changing operation. If the wrong object or file is selected, Salesforce can create incorrect records in bulk. For production orgs, use a small test file first or test the full process in a sandbox.
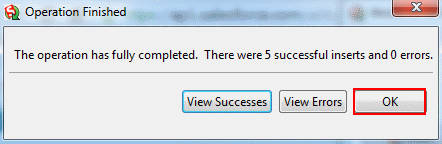
- As shown above a successful completed operation will be displayed.
- Click on Ok button.
Step 5: Review success and error files after Data Loader insert
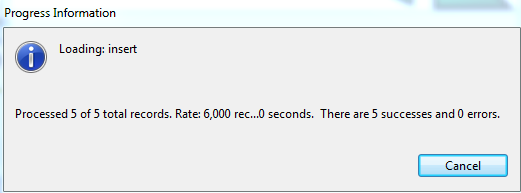
- After clicking OK button we get progress information.
- As shown above we have inserted 5 records in custom object Studentinfo__c using Apex Data Loader.
Data Loader creates result files after the operation. The success file contains the inserted records and their new Salesforce record IDs. The error file contains failed rows with error messages. Do not ignore the error file, even if most records were inserted successfully.
Common Data Loader insert result files:
success.csv  - rows inserted successfully, including new Salesforce IDs
error.csv    - rows that failed, including the reason for failure
Typical insert errors include missing required fields, invalid picklist values, invalid lookup IDs, duplicate rule blocks, validation rule failures, and insufficient access on the object or field.
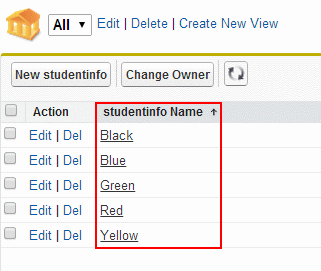
Now click on Any of the record.
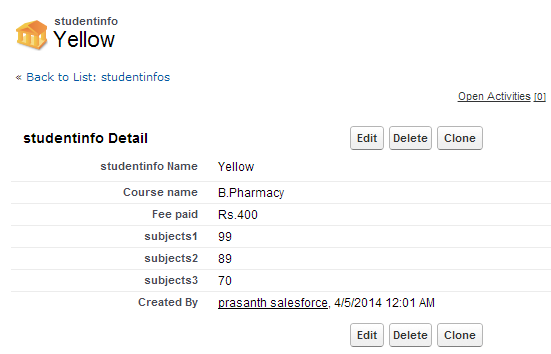
As shown above Studeninfo__c object fields like Course name, Fee paid, Subject1 marks, Subject2 Marks, Subject3 marks are successfully inserted using CSV file using Salesforce Data Loader.
Inserting records with master-detail and lookup relationships
When inserting child records for lookup or master-detail relationships, the CSV must identify the correct parent record. In most cases, this means including the parent Salesforce record ID in the relationship field. For example, when inserting a Contact under an Account, the CSV can include the Account ID in the AccountId column.
LastName,Email,AccountId
Rao,rao@example.com,001XXXXXXXXXXXXXXX
Kumar,kumar@example.com,001YYYYYYYYYYYYYYY
For custom relationship fields, use the correct relationship field API name. If an External ID relationship is configured and supported for your load design, it can reduce the need to manually look up Salesforce record IDs. For a basic admin insert, using verified parent record IDs is easier to understand and audit.
Data Loader insert checklist before running in production
- Confirm that Insert is the correct operation and that existing Salesforce records should not be updated.
- Check object permissions, field permissions, record type access, and API access for the logged-in user.
- Include every required field in the CSV file.
- Use valid lookup or master-detail parent IDs where child records are inserted.
- Check picklist values, dates, currency values, emails, and number formats.
- Review validation rules, duplicate rules, flows, triggers, and assignment rules that may run during insert.
- Save a copy of the original CSV file and the final mapped CSV file.
- Run a small test insert first and review the Salesforce records, success file, and error file.
Common Apex Data Loader insert errors and fixes
| Data Loader insert error | Likely cause | Fix |
| Required fields are missing | The CSV does not include a required standard or custom field. | Add the required column and provide valid values for every row. |
| Invalid picklist value | The CSV value does not match an active Salesforce picklist value. | Correct the spelling, spacing, and active value in Salesforce. |
| Invalid cross reference id | A lookup or master-detail parent ID is wrong or inaccessible. | Verify the parent record ID and user access to that parent record. |
| Duplicate value found | A duplicate rule or unique field blocked the insert. | Clean duplicate rows or decide whether Upsert is the correct operation. |
| Insufficient access rights | The user does not have object, field, record type, or API permissions. | Update permissions or use a user account approved for the data load. |
Apex Data Loader insert FAQ
How do I insert data using Data Loader in Salesforce?
Prepare a CSV file, open Data Loader, click Insert, log in to Salesforce, select the target object, choose the CSV file, map CSV columns to Salesforce fields, confirm the operation, and then review the success and error files.
How many records can be inserted using Salesforce Data Loader?
Data Loader is intended for large CSV-based loads that go beyond Data Import Wizard. Practical limits depend on the current Salesforce Data Loader documentation, API limits, batch settings, and org configuration, so check the official Salesforce guidance before very large inserts.
Can I insert records with specific Salesforce IDs?
No. During Insert, Salesforce generates new record IDs. You cannot choose Salesforce record IDs for new records. If you need to match existing data, use an External ID with Upsert instead of trying to insert fixed Salesforce IDs.
How do I insert child records with master-detail relationships using Data Loader?
Include the parent record reference in the CSV, usually by using the parent Salesforce record ID in the relationship field. The logged-in user must also have access to the parent records.
What should I do after Data Loader insert shows errors?
Open the error CSV file, read the message for each failed row, correct the source data or permissions, and run a new insert only for the failed rows after the issue is fixed.
Conclusion: inserting Salesforce records with Apex Data Loader
In this Salesforce tutorial we have learned about inserting records using Apex Data Loader. The main steps are to prepare a clean CSV file, select the correct Salesforce object, map columns carefully, run the Insert operation, and review success and error files. Salesforce also provides official documentation for inserting, updating, or deleting data using Data Loader. In our next Salesforce admin tutorial we are going to learn about Data loader UPSERT(Update and Insert) operation.