How to create vendor master record in SAP
In this SAP FICO tutorial, you will learn how to create vendor master record in SAP using transaction code XK01. A vendor master record, also called a vendor code, stores supplier details used for accounting, invoice posting, payment processing, purchasing, tax information, and correspondence.
Transaction code XK01 is used to create a vendor centrally with general data, company code data, and purchasing organization data. In many SAP S/4HANA systems, supplier creation is handled through Business Partner transaction BP or Fiori apps, depending on the system design. In classic SAP ERP and systems where classic vendor transactions are enabled, the XK01 process below is used.
Vendor master record data maintained through XK01 in SAP FICO
Vendor master record consists the following configuration screens.
- Create vendor initial screen
- Vendor address
- Vendor control
- Vendor payment transactions
- Vendor accounting information
- Vendor correspondence accounting
- Vendor Purchasing data
SAP transaction code and menu path to create vendor master
You can create vendor master record in SAP by using transaction code or menu path.
| Transaction code | XK01 |
| SAP Menu Path | SAP Menu > Accounting > Financial Accounting > Accounts Payable > Master records > Maintain centrally > XK01-Create. |
Related SAP vendor master transaction codes are useful when your task is limited to one view of the vendor master.
| Transaction code | Purpose | When to use |
|---|---|---|
XK01 | Create vendor centrally | When vendor accounting and purchasing data must be maintained together |
FK01 | Create vendor for accounting view | When only company code and Accounts Payable data is required |
MK01 | Create vendor for purchasing view | When only purchasing organization data is required |
XK02 | Change vendor centrally | When an existing vendor record must be updated |
XK03 | Display vendor centrally | When you only need to view the vendor master record |
Details required before creating a vendor code in SAP
Before starting vendor creation in SAP FICO, keep the required business and configuration details ready. This avoids incomplete vendor records and reduces corrections after saving.
- Company code: The company code for which the vendor will be used in accounting postings.
- Purchasing organization: The purchasing organization that will use the vendor for procurement transactions.
- Vendor account group: The account group controls number assignment, field status, and vendor classification.
- Vendor address and communication details: Name, street, city, region, country, language, phone, and email where applicable.
- Tax and control data: Tax number, industry data, and other control information required by the business process.
- Bank details: Bank country, bank key, account number, and account holder name if payments are made through bank transfer.
- Reconciliation account: The general ledger reconciliation account used for Accounts Payable postings.
- Payment terms and payment methods: Terms used for due date calculation and automatic payment processing.
Configuration steps to create vendor master record in SAP using XK01
You can define vendor master record in SAP by performing the following configuration steps.
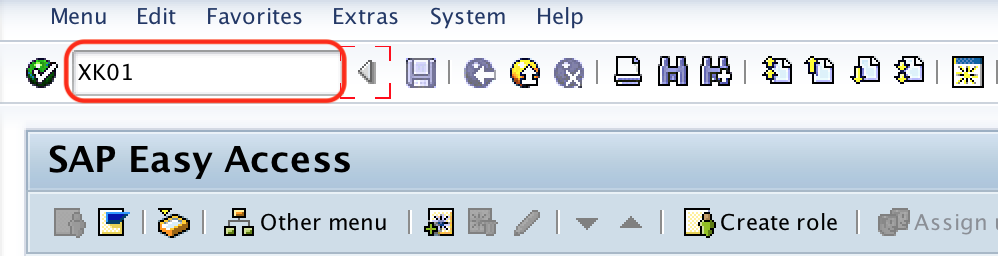
Step 1 : – Execute t-code XK01 in command field from SAP easy access screen.
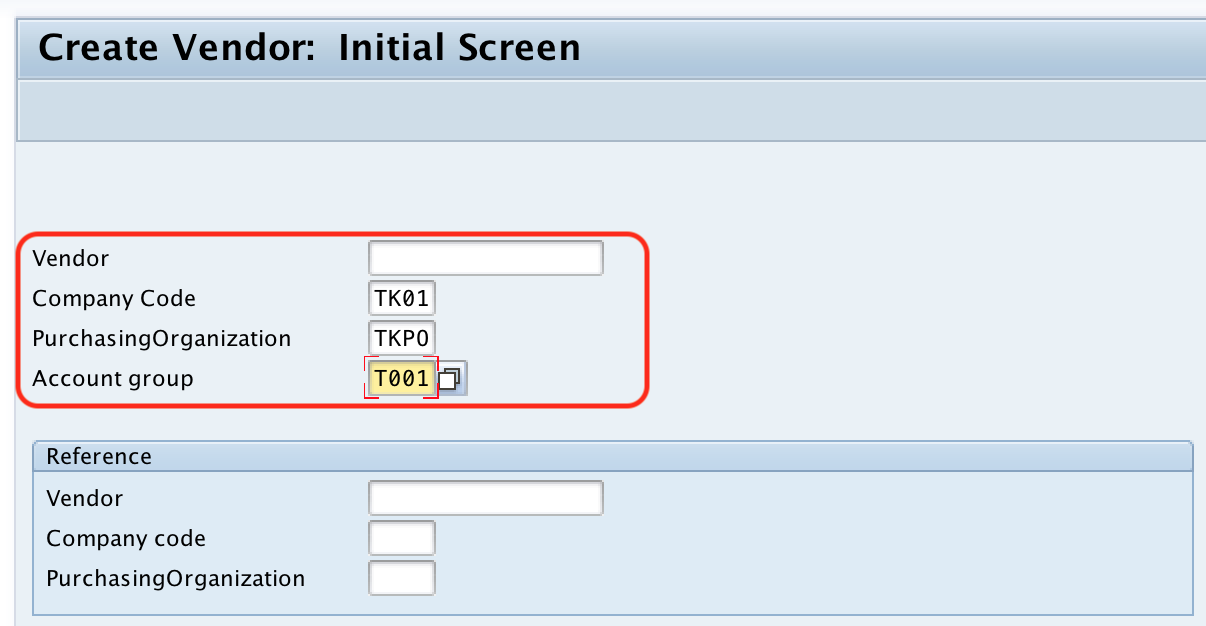
Step 2 : – On create vendor: initial screen, update the following details.
- Company code : – Here you need to enter company code, so that vendor code is applicable for that company code only. After creation of vendor master data, you can extend from one company code to another company code as per requirements of an organization.
- Purchasing organization : – Update the purchasing organization key.
- Account group : – Update the vendor account group.
- Reference : – With the reference of existed vendor code, you can maintain new vendor master record as per requirements.
The account group is important because it determines whether the vendor number is entered manually or assigned by the system. It also controls which fields are required, optional, suppressed, or displayed during vendor creation.
After maintaining the required details, press enter to continue.
Step 3 : – Create Vendor: Address
On create vendor: address screen, Update the required address details of vendor i.e.
- Title – Title of Vendor (Mr, Mrs, Company, etc)
- Name – Name of Vendor
- Street Address – Street/ house number, Postal code, City, Country, Region, etc
- PO Box Address – PO Box #, Postal code.
- Communication – Language, Contact number, Fax, etc.
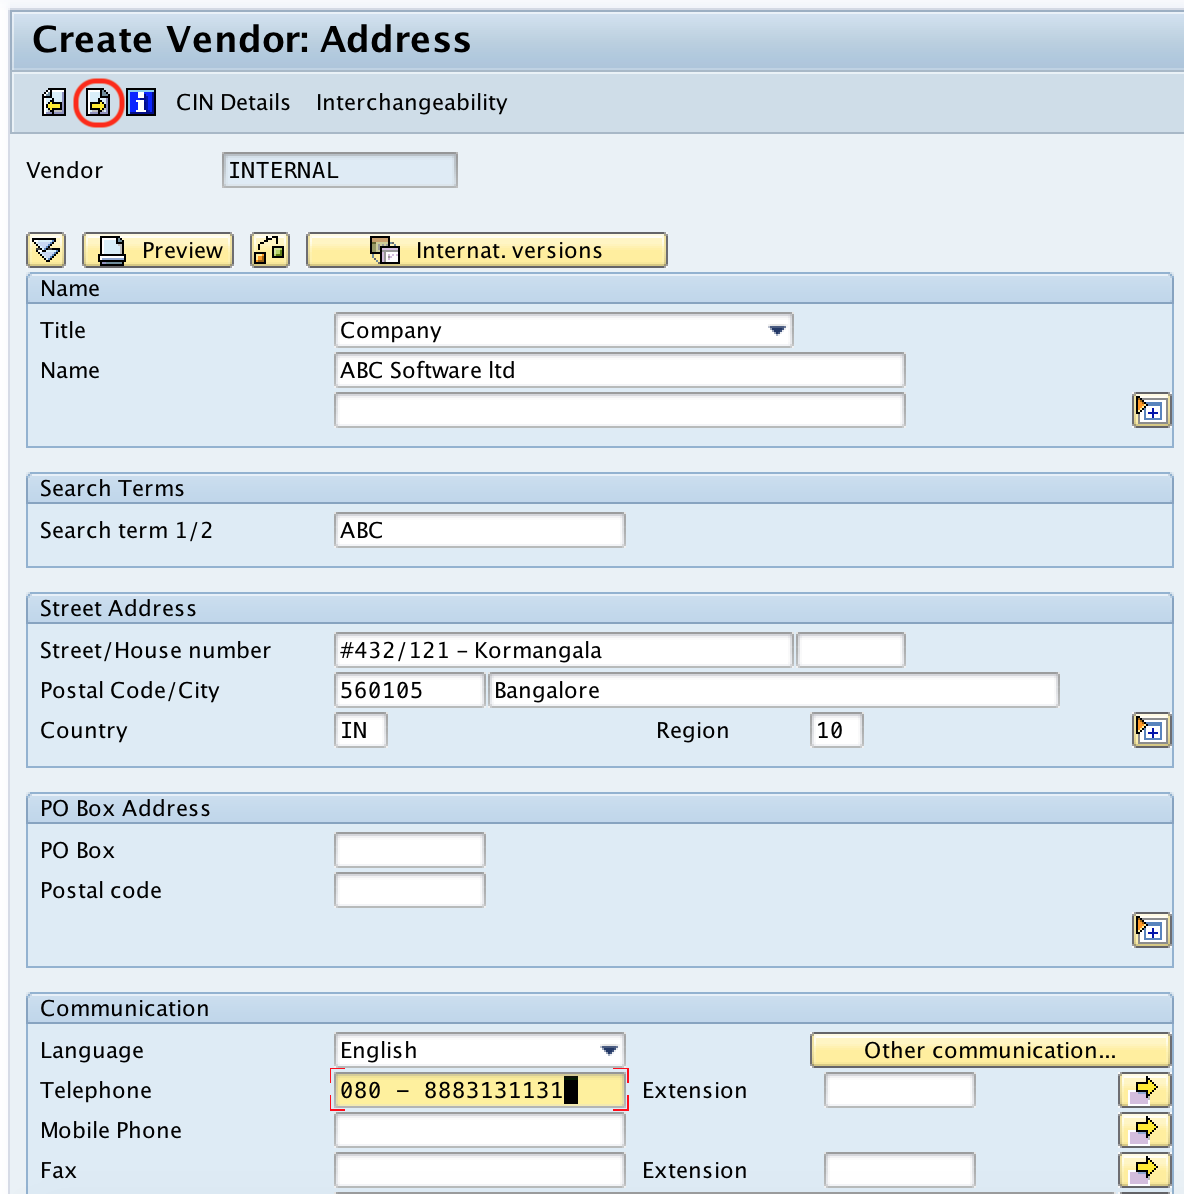
The vendor name and address entered here are used in purchase documents, payment correspondence, tax documents, and vendor communication. Maintain the country and region carefully because they can influence tax and address formatting in later transactions.
After maintaining address details of vendor, click on next screen button as shown above image.
Step 4 : – Create Vendor: Control
On create vendor: Control, update the required vendor control details like account control, Tax information, Reference data, etc.
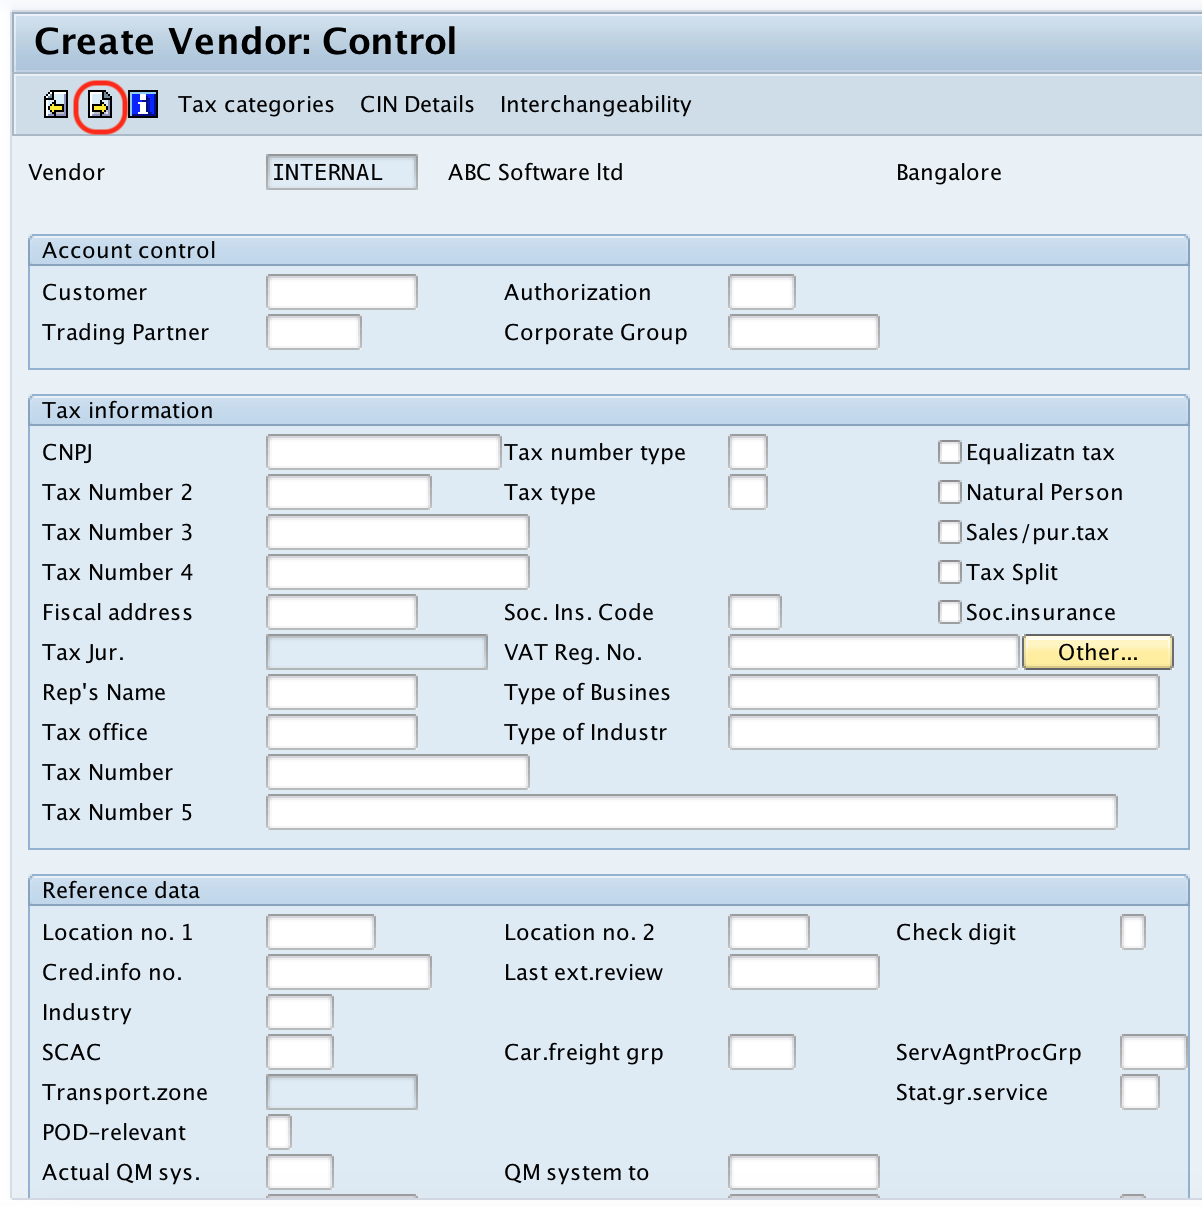
Control data is used to identify the vendor for legal, tax, and business reporting purposes. The fields shown on this screen depend on the country, account group, and system configuration.
After maintaining the required vendor control details, press next screen option.
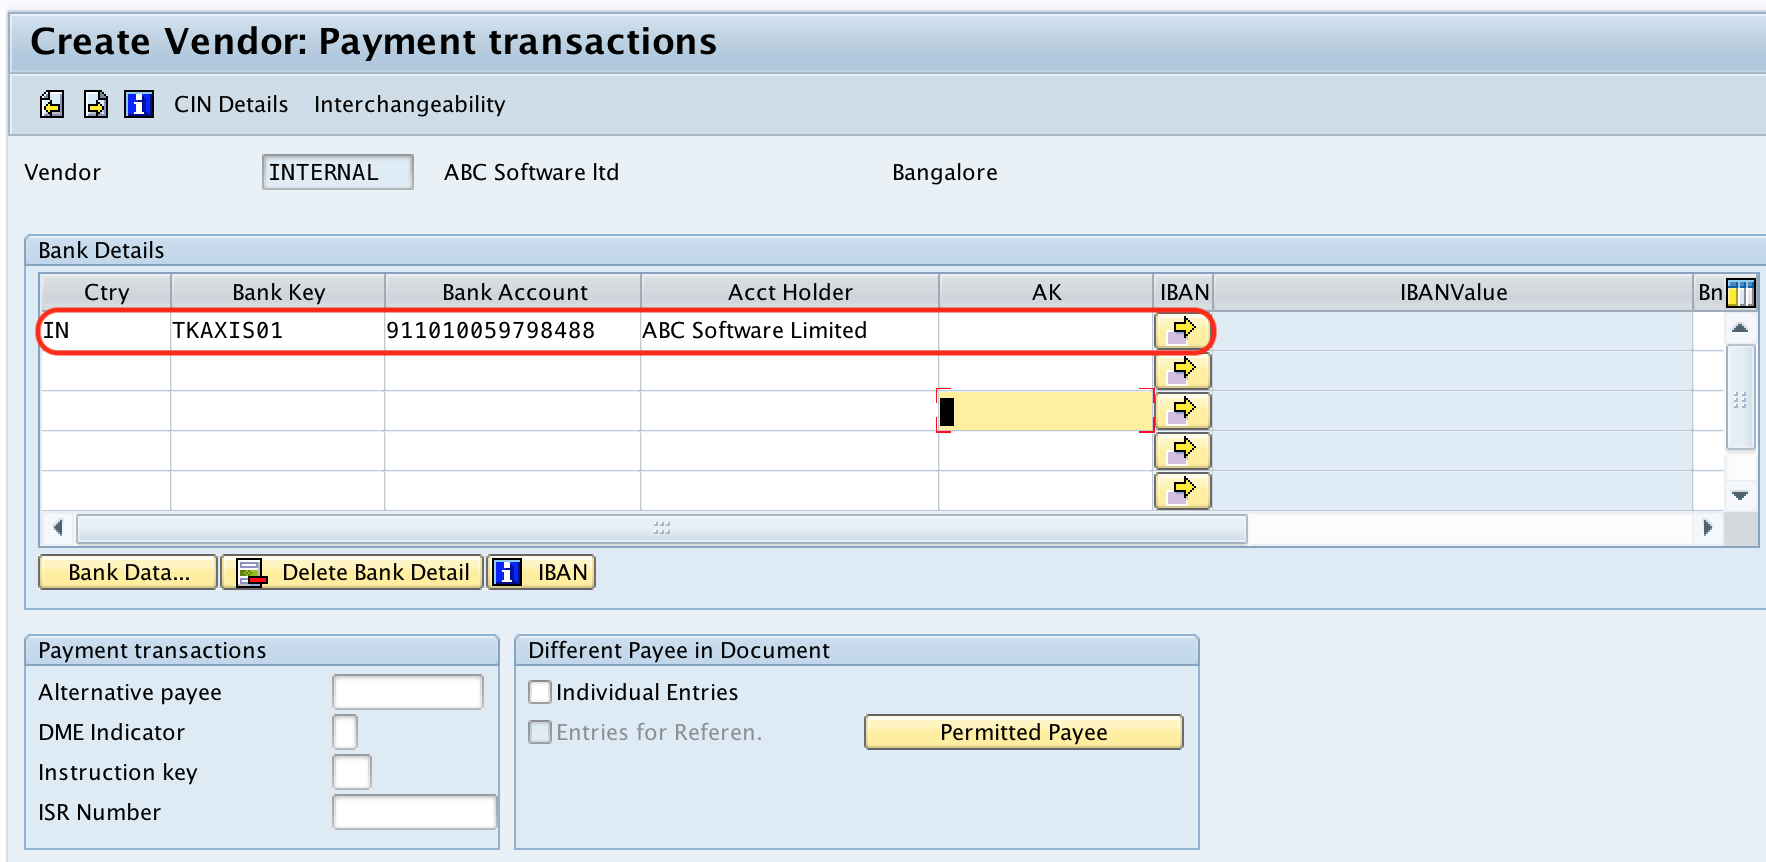
Step 5 : – Create Vendor: Payment transactions
On create vendor : payment transactions screen, update the required bank account details of vendor.
- Country key
- Bank key
- Bank account number
- Account Holder name
Bank details should be entered only after verification with approved vendor onboarding documents. Incorrect bank data can affect automatic payment runs and payment files.
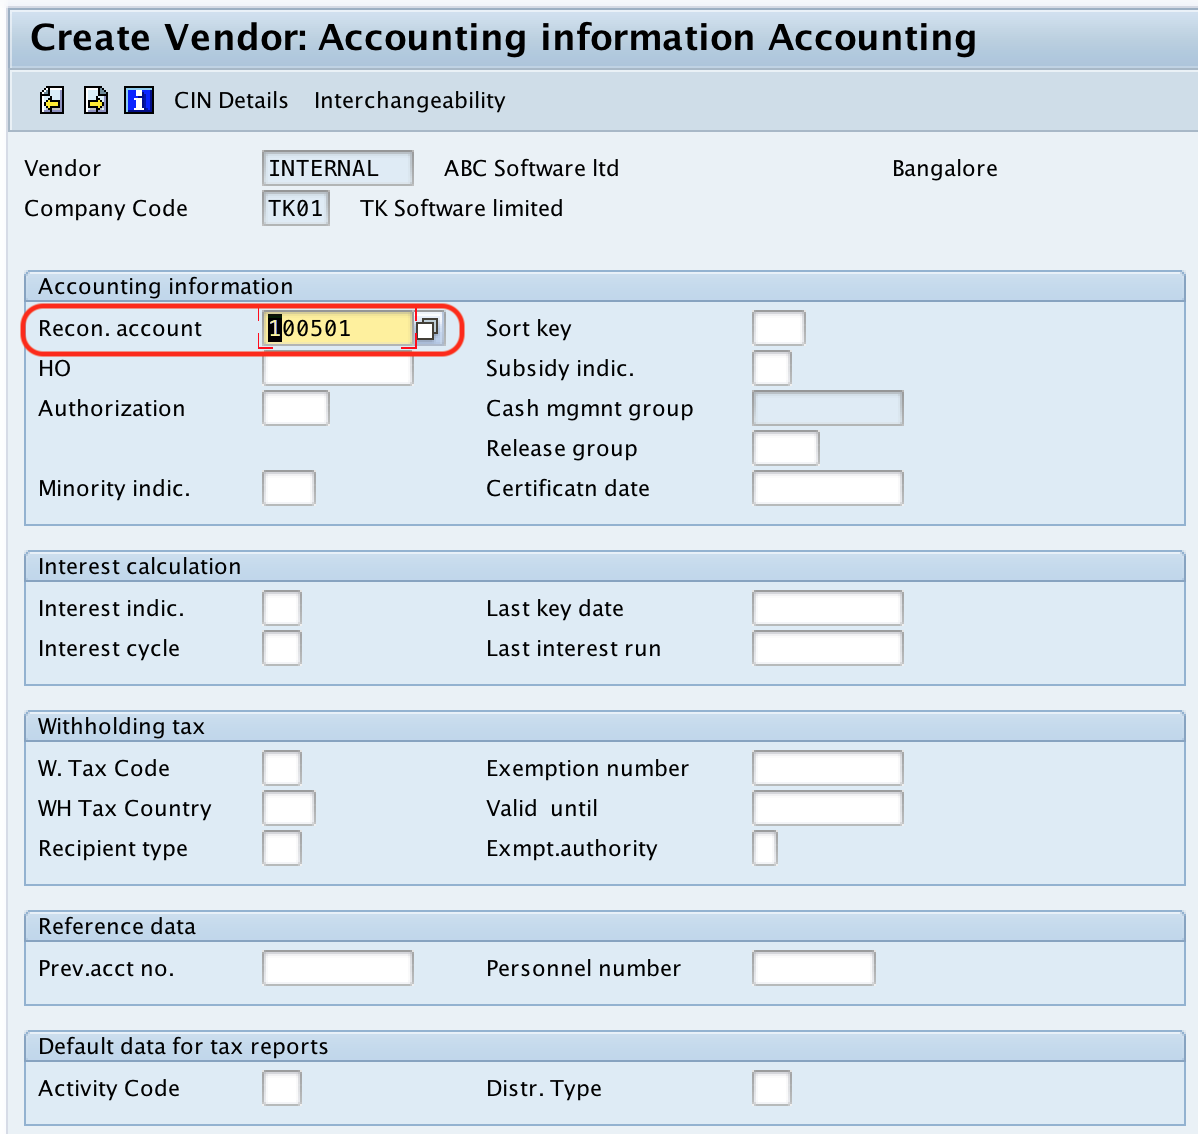
Step 6 : – Create vendor : Accounting information Accounting
In this screen, update vendor reconciliation account (Sundry creditor account).
The reconciliation account links vendor subledger postings with the general ledger. When you post an invoice to the vendor, SAP updates the vendor account and the assigned reconciliation account automatically. Select the reconciliation account according to the vendor category and chart of accounts used by the company code.
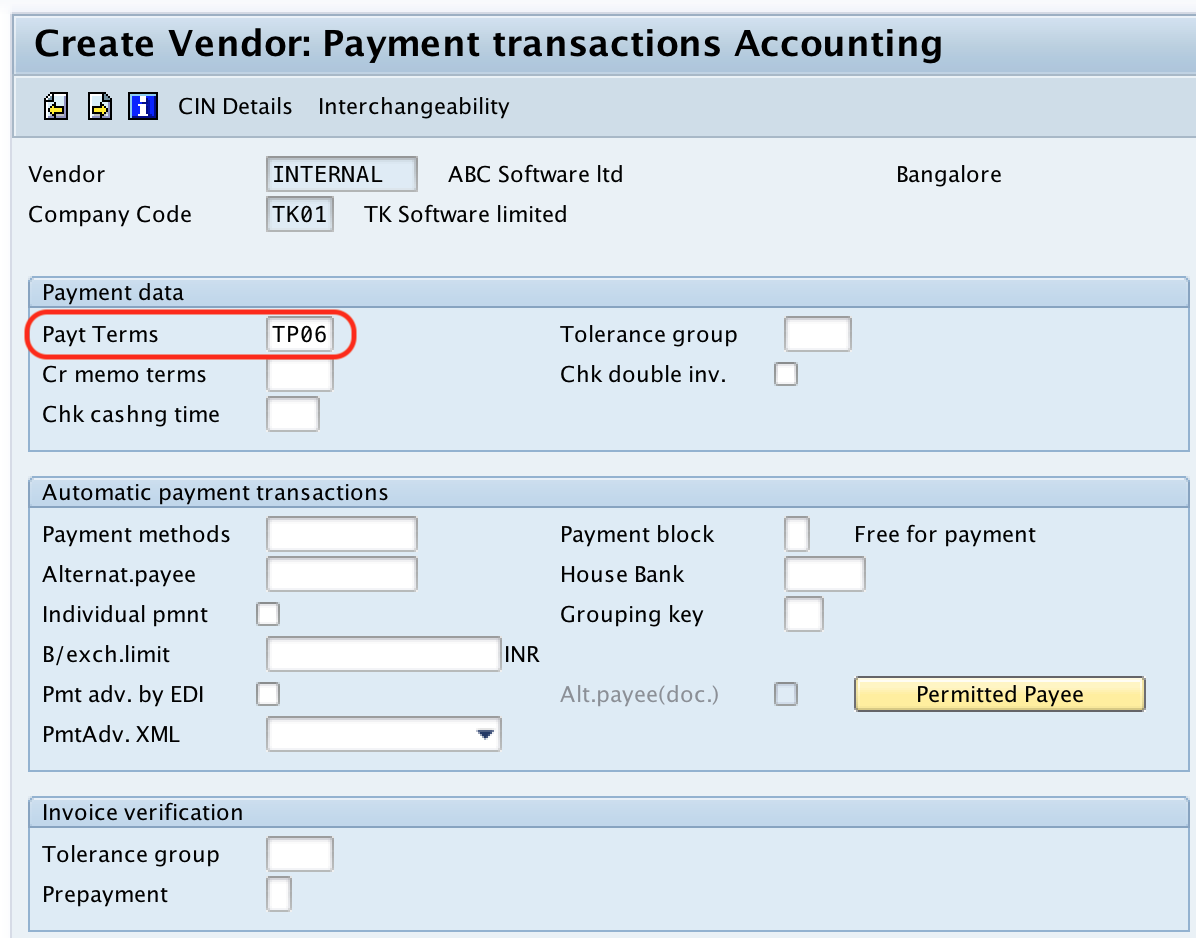
Step 7 : – Create Vendor Payment transactions accounting
Click on next screen option and on create vendor payment transaction accounting screen, update the required details like payment terms, automatic payment transactions, invoice verification, etc.
Payment terms determine due dates and cash discount dates for vendor invoices. Payment methods and payment block settings are used during automatic payment processing. Maintain these fields according to the payment policy of the company code.
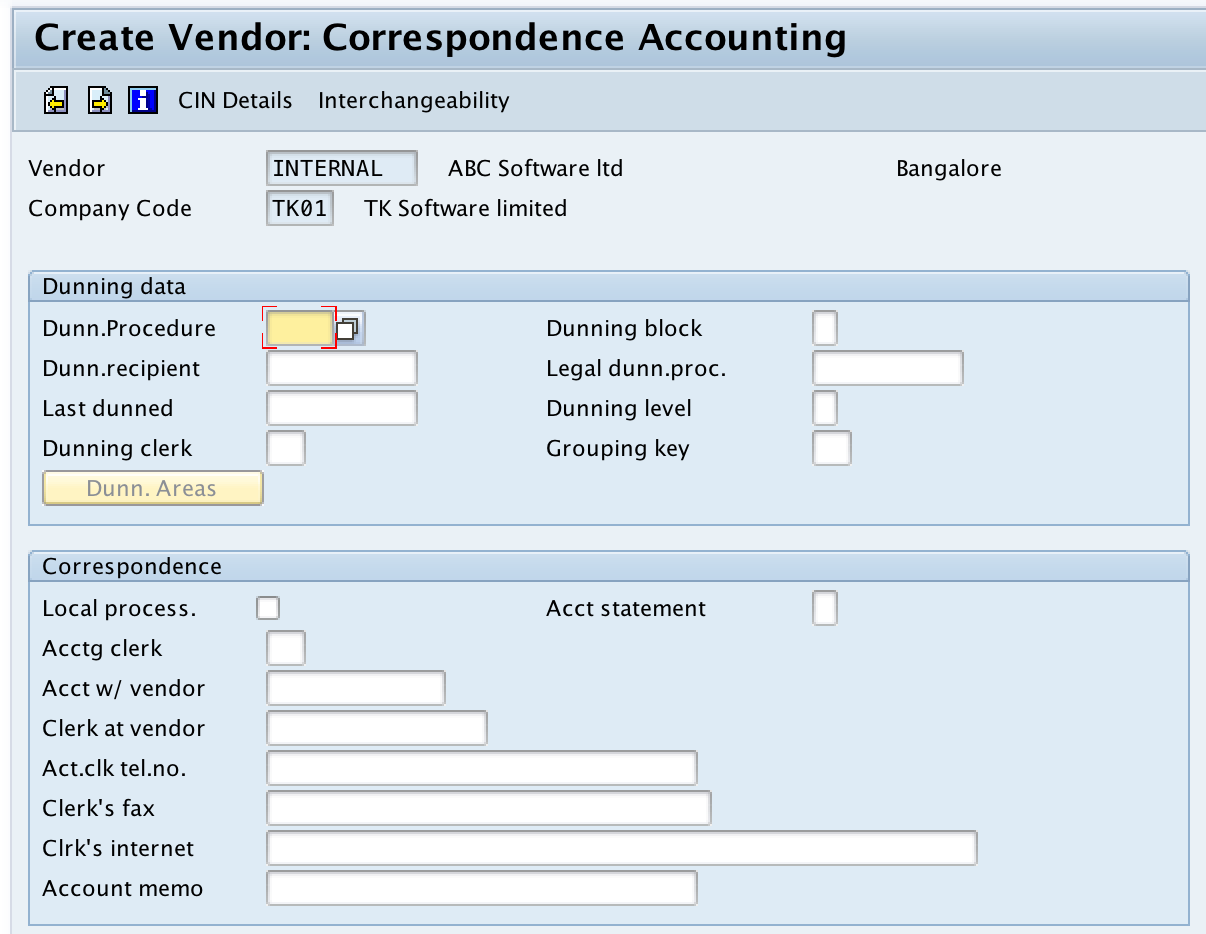
Step 8 : – Create Vendor : Correspondence Accounting
On correspondence accounting screen, update the details of dunning data details, Correspondence details, etc.
Correspondence settings control how the vendor receives account statements, payment notices, and related communication. The fields available here depend on the correspondence and dunning procedures configured in the SAP system.
Step 9 : – Create Vendor : Purchasing data
In the next screen, purchasing data, update the required details of Conditions, Sales data, control data, Invoice verification data, default data material, Service data, etc.
Purchasing data is used by SAP MM during purchase requisition, purchase order, goods receipt, and invoice verification processes. Common fields include order currency, payment terms, Incoterms, partner functions, schema group, and goods receipt based invoice verification settings.

After maintaining all the required details, choose save icon and save the configured vendor master record in SAP. You will get a message as “Vendor 5006 has been created for company code TK01 purchasing organization TKPO.

Successfully we have created new vendor code in SAP system.
How SAP vendor master data is divided into general, company code, and purchasing views
When you create a vendor centrally through XK01, SAP stores vendor data in different views. Understanding these views helps you troubleshoot missing fields and incomplete vendor setup.
| Vendor master view | Main purpose | Typical fields |
|---|---|---|
| General data | Applies across the client | Name, address, language, tax details, bank data |
| Company code data | Applies to one company code | Reconciliation account, payment terms, payment methods, correspondence settings |
| Purchasing organization data | Applies to one purchasing organization | Order currency, Incoterms, schema group, partner functions, invoice verification settings |
If a vendor is created only for accounting, it may not be available for purchase order processing. If a vendor is created only for purchasing, accounting users may not be able to post invoices until company code data is extended.
Common errors while creating vendor master record in SAP
- Wrong account group selected: The vendor number range and screen fields may not match the vendor type.
- Missing reconciliation account: Vendor invoice posting cannot work correctly without a proper reconciliation account in company code data.
- Purchasing organization not maintained: The vendor may be created for accounting but unavailable for procurement documents.
- Incomplete bank information: Automatic payments may fail or require manual correction.
- Incorrect payment terms: Invoice due dates and cash discount calculations may be wrong.
- Duplicate vendor record: Always search existing vendors before creating a new vendor code.
QA checklist for SAP vendor master record creation tutorial
- The tutorial clearly states that
XK01creates a vendor centrally in SAP. - The article explains the difference between
XK01,FK01,MK01,XK02, andXK03. - The initial screen fields include company code, purchasing organization, account group, and reference vendor.
- The steps cover address, control, bank, accounting, payment, correspondence, and purchasing data.
- The explanation mentions the reconciliation account and payment terms because they are important for SAP FICO postings.
- The tutorial warns readers to check for duplicate vendors before creating a new vendor code.
SAP vendor master record creation FAQs
How do you create a vendor master record in SAP?
To create a vendor master record in SAP, execute transaction code XK01, enter company code, purchasing organization, and account group, then maintain address, control, payment, accounting, correspondence, and purchasing data. Save the record to generate or store the vendor code, depending on the account group number range settings.
What is the transaction code for creating vendor master in SAP?
The central transaction code for creating a vendor master record is XK01. For accounting-only vendor creation, FK01 is used. For purchasing-only vendor creation, MK01 is used.
What is the difference between XK01 and FK01 in SAP?
XK01 creates the vendor centrally with company code and purchasing organization data. FK01 creates the vendor from the accounting view and is mainly used for Accounts Payable company code data.
What is the role of account group in SAP vendor master?
The vendor account group controls vendor number assignment, field status, and vendor classification. It determines whether the vendor number is internal or external and which fields are required during vendor creation.
How is vendor creation different in SAP S/4HANA?
In many SAP S/4HANA systems, suppliers are created and maintained through Business Partner transaction BP or Fiori apps. Classic vendor transaction codes such as XK01 may still be available in some systems, but the business partner approach is commonly used in S/4HANA implementations.
Conclusion on creating vendor master record in SAP FICO
In this tutorial, we learned how to create vendor master record in SAP using transaction code XK01. The key points are to choose the correct account group, maintain accurate general data, enter the required company code accounting data, and complete purchasing organization data when the vendor will be used in procurement.